VoCore2: OpenWrt 21.02 Patch/Compile-1

OpenWrt 21.02.2 is pretty stable, the even better part is it supports WPA3. Official OpenWrt 21.02.2 release directly work with VoCore2 SBC version, but for VoCore2 Ultimate version, we have some external devices need to be supported, so this blog and following blogs I will write down the process I patch OpenWrt 21.02.

There are three main parts:

  1. microSD card can not detect or read.
  2. ES8388 sound card can not work.
  3. DTS(device tree) need to update add 1,2 setting.

In my experience, microSD problem is mainly caused by default mmc driver who do not support cd-polling. cd-polling is used to scan the microSD card insert into the slot but not using card detect pin. Actually I have already submit this patch to 18.06 and 19.07, so I just need to copy and paste the patch to make it work on 21.02.

ES8388 sound card driver code is already in Linux system. For 19.07 I have a dirty patch. The better way is to write a simple clock control driver, and use DTS to setup it. For this version, I will try to make it.

DTS, this is pretty painful to learn because current tutorial is not very friendly for beginner. I will try to write another not that painful tutorial…

Screen: WinUSB Install + New Test App

I find libusbk sometimes crash the system, so maybe winusb is a good choice. Before you install WinUSB, remember to install libusbK first.

Here is a simple tutorial about install winusb driver.

First download zadig, it is include in https://vocore.io/misc/v2scrctl-release.zip, in folder v2scrtest.

Plug in the screen and run zadig.exe

Select USB2.0 Screen from the list. Then click Install Driver. (If already installed, it will be Reinstall Driver, normally do not need install again).

Install will take around 2 minutes.

After that, for win10 or upper system can directly run v2scrctl.exe for test the screen.

You can drag and drop test.jpg or any other picture file to the window to let it show on the screen. Also it can show the touch points from the screen.

Have fun!

.

Tool: Convert PDF to PNG

My boss today asked me convert a PDF file to PNG file because they can not use mspaint to edit any PDF file… Of course I know it is very simple by using xpdf, but I also know the cleaver boss will never learn using command line tool. 🙂

So I have to write a simple tool to avoid they ask me again.

After two hours, it is done. Just drag and drop the PDF to the window, then it will create PNG files into desktop/pdf2png folder. Bosss do not have to type a word.

Download link: http://vonger.cn/misc/tools/pdf2png.alpha.zip

PS: not sure if it will work on other windows computer, but at least it works on my win10 and another win7 system.

Hope it helps 🙂

VoCore2: Compile OpenWrt 21.02 in MacOS

Finally OpenWrt new version comes to stable. There are many great new feature for new Linux kernel and also improve stable for OpenWrt, why not have a try?

First, everything is same as usual, make an image by Disk Utility, 10GB is enough.

Clone from OpenWrt, I use github version, it is faster than openwrt server: git clone https://github.com/openwrt/openwrt.git -b openwrt-21.02

We can not use make, because it will throw error: /Volumns/OpenWrt21/include/toplevel.mk:29: *** Please use a newer version of GNU make. The version shipped by Apple is not supported.  Stop.

Use brew install make, then call gmake menuconfig will fix such problem.

After menuconfig select correct settings, we can directly call gmake V=s to start the make process.

After a while, it will stop at “Checking for c++filt…“, it is for libstdc++-v3, we need to go to build_dir libstdc++-v3 folder, modify configure file, delete from line 79170 to 79296 to avoid checking such command. No idea why it stuck there…and c++filt seems not critical if not exists.

Then just keep building, rest seems smoothly.

Next blog I will check if there is any bug need to patch for this new version.

VoCore2: Compile Latest Wifi Driver 2

Because of the macro is pretty complex, have to use a trick. The old version Makefile works fine, so we can use its macro define.

Grab the Makefile command line first:

mipsel-openwrt-linux-musl-gcc -Wp,-MD,/Volumes/OpenWrt18/build_dir/target-mipsel_24kc_musl/linux-ramips_mt76x8/mt7628-p4rev-120395/build/../src/embedded/os/linux/.rt_pci_rbus.o.d  -nostdinc -isystem /Volumes/OpenWrt18/staging_dir/toolchain-mipsel_24kc_gcc-7.3.0_musl/bin/../lib/gcc/mipsel-openwrt-linux-musl/7.3.0/include -I./arch/mips/include -I./arch/mips/include/generated  -I./include -I./arch/mips/include/uapi -I./arch/mips/include/generated/uapi -I./include/uapi -I./include/generated/uapi -include ./include/linux/kconfig.h -D__KERNEL__ -DVMLINUX_LOAD_ADDRESS=0xffffffff80000000 -DLINKER_LOAD_ADDRESS=0x80000000 -DDATAOFFSET=0 -Wall -Wundef -Wstrict-prototypes -Wno-trigraphs -fno-strict-aliasing -fno-common -fshort-wchar -Werror-implicit-function-declaration -Wno-format-security -std=gnu89 -fno-PIE -mno-check-zero-division -mabi=32 -G 0 -mno-abicalls -fno-pic -pipe -mno-branch-likely -msoft-float -DGAS_HAS_SET_HARDFLOAT -Wa,-msoft-float -ffreestanding -fno-stack-check -march=mips32r2 -mtune=34kc -Wa,--trap -DTOOLCHAIN_SUPPORTS_VIRT -I./arch/mips/include/asm/mach-ralink -I./arch/mips/include/asm/mach-ralink/mt7620 -I./arch/mips/include/asm/mach-generic -fno-asynchronous-unwind-tables -fno-delete-null-pointer-checks -Wno-frame-address -Wno-format-truncation -Wno-format-overflow -Wno-int-in-bool-context -Os -fno-caller-saves --param=allow-store-data-races=0 -DCC_HAVE_ASM_GOTO -Wframe-larger-than=1024 -fstack-protector -Wno-unused-but-set-variable -Wno-unused-const-variable -fomit-frame-pointer -fno-var-tracking-assignments -g -femit-struct-debug-baseonly -fno-var-tracking -Wdeclaration-after-statement -Wno-pointer-sign -Wno-array-bounds -Wno-stringop-overflow -Wno-restrict -Wno-maybe-uninitialized -fno-strict-overflow -fno-merge-all-constants -fmerge-constants -fno-stack-check -fconserve-stack -Werror=implicit-int -Werror=strict-prototypes -Werror=date-time -Werror=incompatible-pointer-types -Werror=designated-init -I/Volumes/OpenWrt18/build_dir/target-mipsel_24kc_musl/linux-ramips_mt76x8/mt7628-p4rev-120395/build/../src/include -I/Volumes/OpenWrt18/build_dir/target-mipsel_24kc_musl/linux-ramips_mt76x8/mt7628-p4rev-120395/build/../src/embedded/include -I/Volumes/OpenWrt18/build_dir/target-mipsel_24kc_musl/linux-ramips_mt76x8/mt7628-p4rev-120395/build/../src/ate/include -DCONFIG_SUPPORT_OPENWRT=y -DCONFIG_RALINK_MT7628=y -DNEW_RATE_ADAPT_SUPPORT -DUAPSD_SUPPORT -DUAPSD_DEBUG -DMT_PS -DWSC_INCLUDED -DWSC_SINGLE_TRIGGER -DWSC_AP_SUPPORT -DWSC_V2_SUPPORT -DDOT11W_PMF_SUPPORT -DSOFT_ENCRYPT -DMBSS_SUPPORT -DMT7628 -DMT_BBP -DMT_RF -DRTMP_RBUS_SUPPORT -DRTMP_RF_RW_SUPPORT -DMT_MAC -DRTMP_MAC_PCI -DRTMP_PCI_SUPPORT -DRTMP_FLASH_SUPPORT -DDMA_SCH_SUPPORT -DRTMP_EFUSE_SUPPORT -DCONFIG_ANDES_SUPPORT -DRESOURCE_PRE_ALLOC -DNEW_MBSSID_MODE -DENHANCE_NEW_MBSSID_MODE -DENHANCED_STAT_DISPLAY -DFIFO_EXT_SUPPORT -DMCS_LUT_SUPPORT -DUSE_BMC -DTHERMAL_PROTECT_SUPPORT -DCAL_FREE_IC_SUPPORT -DAGGREGATION_SUPPORT -DPIGGYBACK_SUPPORT -DWMM_SUPPORT -DLINUX -Wall -Wstrict-prototypes -Wno-trigraphs -DCONFIG_AP_SUPPORT -DSCAN_SUPPORT -DAP_SCAN_SUPPORT -DDOT11_N_SUPPORT -DDOT11N_DRAFT3 -DSTATS_COUNT_SUPPORT -DIAPP_SUPPORT -DDOT1X_SUPPORT -DCONFIG_RA_NAT_NONE -DDBG -DIP_ASSEMBLY  -DMODULE -mno-long-calls  -DKBUILD_BASENAME='"rt_pci_rbus"'  -DKBUILD_MODNAME='"mt7628"' -c -o /Volumes/OpenWrt18/build_dir/target-mipsel_24kc_musl/linux-ramips_mt76x8/mt7628-p4rev-120395/build/../src/embedded/os/linux/rt_pci_rbus.o /Volumes/OpenWrt18/build_dir/target-mipsel_24kc_musl/linux-ramips_mt76x8/mt7628-p4rev-120395/build/../src/embedded/os/linux/rt_pci_rbus.c

Now we can find the define: -DCONFIG_SUPPORT_OPENWRT=y -DCONFIG_RALINK_MT7628=y -DNEW_RATE_ADAPT_SUPPORT -DUAPSD_SUPPORT -DUAPSD_DEBUG -DMT_PS -DWSC_INCLUDED -DWSC_SINGLE_TRIGGER -DWSC_AP_SUPPORT -DWSC_V2_SUPPORT -DDOT11W_PMF_SUPPORT -DSOFT_ENCRYPT -DMBSS_SUPPORT …

Compare Makefile, we can get the defines. Update Makefile…

PKG_CONFIG_DEPENDS:=\
    CONFIG_MT7628_AP_SUPPORT=m \
    CONFIG_SUPPORT_OPENWRT=y \
    CONFIG_RALINK_MT7628=y \
    CONFIG_MT7628_NEW_RATE_ADAPT_SUPPORT=y \
    CONFIG_MT7628_UAPSD=y \
    CONFIG_MT7628_MAC=y \
    CONFIG_MT7628_WSC_INCLUDED=y \
    CONFIG_MT7628_WSC_V2_SUPPORT=y \
    CONFIG_MT7628_DOT11W_PMF_SUPPORT=y \
    CONFIG_MT7628_MBSS_SUPPORT=y \
    CONFIG_MT7628_WPA3_SUPPORT=y 

Then call “make package/mt7628/compile V=s”

Because there is no patch, we will get a lot of errors…I find most of the problem is not critical…Like this:

/Volumes/OpenWrt/build_dir/target-mipsel_24kc_musl/linux-ramips_mt76x8/mt7628-wifi/mt7628_wifi_ap/../mt7628_wifi/embedded/common/wsc.c:9903:2: note: ...this statement, but the latter is misleadingly indented as if it were guarded by the 'if

The driver internal Makefile default has -Werror, so such warning from new compiler gcc are dealed as error. That can be removed. Rest problem is because of new Linux kernel modify, so final patch like this:

--- a/mt7628_wifi_ap/Makefile
+++ b/mt7628_wifi_ap/Makefile
@@ -533,7 +533,7 @@
 #  CFLAGS
 ##################
 EXTRA_CFLAGS += -DAGGREGATION_SUPPORT -DPIGGYBACK_SUPPORT -DWMM_SUPPORT  -DLINUX \
-               -Wall -Wstrict-prototypes -Wno-trigraphs -Werror -Wframe-larger-than=4096
+               -Wall -Wstrict-prototypes -Wno-trigraphs -Wframe-larger-than=4096
 #-DDBG_DIAGNOSE -DDBG_RX_MCS -DDBG_TX_MCS
 
 EXTRA_CFLAGS += -DCONFIG_AP_SUPPORT -DSCAN_SUPPORT -DAP_SCAN_SUPPORT
--- a/mt7628_wifi/embedded/common/cmm_info.c
+++ b/mt7628_wifi/embedded/common/cmm_info.c
@@ -97,7 +97,6 @@
 {
 #ifdef CONFIG_AP_SUPPORT
 	IF_DEV_CONFIG_OPMODE_ON_AP(pAd)
-		MTWF_LOG(DBG_CAT_ALL, DBG_SUBCAT_ALL, DBG_LVL_OFF, ("Driver version-%s %s %s\n", AP_DRIVER_VERSION, __DATE__, __TIME__));
 #endif /* CONFIG_AP_SUPPORT */
 
 #ifdef CONFIG_STA_SUPPORT
--- a/mt7628_wifi/embedded/os/linux/rt_profile.c
+++ b/mt7628_wifi/embedded/os/linux/rt_profile.c
@@ -236,7 +236,7 @@
 		{
 #ifndef OS_ABL_SUPPORT
 			// TODO: need to roll back when convert into OSABL code
-				 fsize = (ULONG)srcf->f_dentry->d_inode->i_size;
+				 fsize = (ULONG)srcf->f_path.dentry->d_inode->i_size;
 				if (buf_size < (fsize + 1))
 					buf_size = fsize + 1;
 #endif /* OS_ABL_SUPPORT */
--- a/mt7628_wifi/embedded/common/wsc.c
+++ b/mt7628_wifi/embedded/common/wsc.c
@@ -9847,7 +9847,7 @@
 	//PWSC_UPNP_NODE_INFO pWscUPnPNodeInfo;
 	UCHAR		apIdx;
 
-#ifdef LINUX
+#ifdef LINUX_SIG
 #ifdef WSC_SINGLE_TRIGGER
 /* +++  added by YYHuang@Ralink, 08/03/12 */
 /*
--- a/mt7628_wifi/embedded/os/linux/rt_proc.c
+++ b/mt7628_wifi/embedded/os/linux/rt_proc.c
@@ -29,7 +29,7 @@
 #include <linux/kernel.h>
 #include <linux/types.h>
 #include <linux/proc_fs.h>
-#include <asm/uaccess.h>
+#include <linux/uaccess.h>
 
 #include "rt_config.h"

Then we can successfully get the mt7628.ko file.

VoCore2: Compile Latest Wifi Driver(version 20190925)

MediaTek wifi driver already supported WPA3, and works stable; compared to the opensourced one, still has high chance(20~30%) disconnect while using, and speed is very unstable. So before I can understand and fix the opensource wifi driver problem, I guess a fast way is to port the MediaTek wifi driver first.

Currently I am making some progress about Makefile, but still can not get compiled mt7628.ko yet. There is a lot of CONFIG define need to be clear first, or it will bring weird trouble. This must be a long way to go.

 include $(TOPDIR)/rules.mk
include $(INCLUDE_DIR)/kernel.mk


PKG_NAME:=mt7628-wifi
PKG_SOURCE:=MT7628_LinuxAP_V4.1.1.0_DPA_20190925.tar.bz2
PKG_SOURCE_URL:=http://vonger.cn/misc/vocore2/
PKG_MD5SUM:=20db265032718ccde1c9e12f89939c0e
PKG_BUILD_DIR:=$(KERNEL_BUILD_DIR)/$(PKG_NAME)


include $(INCLUDE_DIR)/package.mk

PKG_CONFIG_DEPENDS:=\
    CONFIG_MT7628_AP_SUPPORT=m \
    CONFIG_SUPPORT_OPENWRT=y \
    CONFIG_RALINK_MT7628=y \
    CONFIG_MT7628_NEW_RATE_ADAPT_SUPPORT=y \
    CONFIG_MT7628_UAPSD=y \
    CONFIG_MT7628_MAC=y \
    CONFIG_MT7628_WSC_INCLUDED=y \
    CONFIG_MT7628_WSC_V2_SUPPORT=y \
    CONFIG_MT7628_DOT11W_PMF_SUPPORT=y \
    CONFIG_MT7628_MBSS_SUPPORT=y \
    CONFIG_MT7628_WPA3_SUPPORT=y 


include $(INCLUDE_DIR)/package.mk


TAR_CMD=$(HOST_TAR) -C $(1)/ $(TAR_OPTIONS)


define KernelPackage/mt7628-wifi
  TITLE:=MTK MT7628 WiFi Driver
  FILES:=$(PKG_BUILD_DIR)/mt7628.ko
  SECTION:=vocore2
  CATEGORY:=VoCore2
  AUTOLOAD:=$(call AutoLoad,98,mt7628)
endef


define Build/Compile
$(MAKE) -C "$(LINUX_DIR)" \
CROSS_COMPILE="$(TARGET_CROSS)" \
ARCH="$(LINUX_KARCH)" \
SUBDIRS="$(PKG_BUILD_DIR)/mt7628_wifi_ap" \
M="$(PKG_BUILD_DIR)/mt7628_wifi_ap" \
$(PKG_CONFIG_DEPENDS) \
modules
endef


$(eval $(call KernelPackage,mt7628-wifi))

A simple explain of the Makefile. First from start to “include package.mk” just declare the package download path. PKG_CONFIG_DEPENDS is the real driver configure, this should be done in menuconfig, but for simple, I put it into Makefile. TAR_CMD is a modify version of tar, or when you compile openwrt will complain source code path is not correct. “define KernelPackage/mt7628-wifi” to “endef” is used to show this driver in openwrt menuconfig.

The most important one is “define Build/Compile”, this block is the command used to compile Linux kernel driver, we use the PKG_CONFIG_DEPENDS here. Actually you can directly change every marco in this command line to real path and file, then it can directly work in command line.

Screen: Unique ID

In order to indicate every vocore screen connect to the computer, we have two ways:

  1. use USB physics port, but once screen unplug and plug to other USB port, this id will change.
  2. save a unique id into firmware, so every time we can read it from firmware, it will not change.

The second way maybe better for indicate different screens, so for new screens, we will have a unique id store into flash. ID takes 8byte, like B8D8-C876-CC123456, it is alloced in factory production process.

For old driver board do not have unique id, we need to write a unique id to it.

I write a simple tool to read and write unique id from driver board. Download link http://vonger.cn/misc/screen/screen_uid.20210907.zip

It has source code inside. For Linux and MacOS, please call gcc screen_uid.c -o screen_uid -lusb-1.0 to get the executable application.

Run screen_uid.exe, it will show the screen it detected.

Find screen at USB physics port 3
1: Type: 4inch, 480x800x16, TOSHIBA-2122
id: 0000-0000-00000000


choose a screen by index to set random id(1~1, other cancel): 

PS: if no id in the firmware, id part will be 0000-0000-00000000 or ffff-ffff-ffffffff

Input id 1 to modify first screen in the list, then a random id will write to it.

After that we have alloc a new random id to the screen.

Find screen at USB physics port 3
1: Type: 4inch, 480x800x16, TOSHIBA-2122
id: ef00-4900-f1aede55

Next time run, we will find it has a new id, and if you do not want to modify it, directly press return/enter button to quit the write id process.

Screen: hardware upgrade

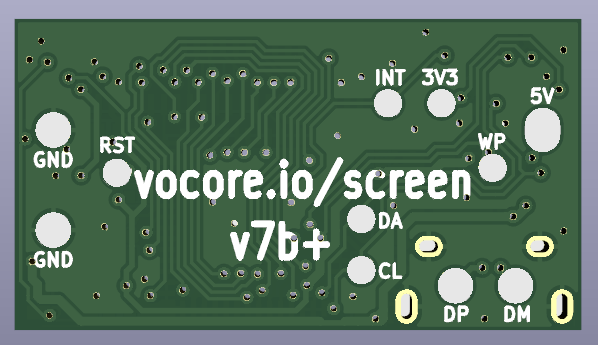
We are going to have first big hardware upgrade for the driver board. Upgrade from version v7a to v7b and v10a to v10b.

New features and changes:

  1. increase backlight brightness, from approx. 300lu to 400lu.
  2. fit new version 4.3inch screen and later possible new model 4inch screen.
  3. increase stable, solder protect diode directly on board.
  4. increase stable, add write protect signal to eeprom to avoid software mistake write.
  5. change SMT pad size and shape for easy mount on other PCB board.
  6. change SMT pad silkscreen text from “+”, “-” to “DP”, “DM”.
  7. change 8p FPC connector to increase its usage life time.
  8. v10b use purple PCB to avoid confuse with green PCB v7b.
  9. PCB board thickness from 0.8mm to 1mm, increase physics strength.
  10. other small changes to increase USB stable and lower power consume.

Expect new driver boards will come at early of Sep 🙂

Screen: Glass is really easy to break…

Recently we get report about some screens are broken. The bad one looks like this:

It shows some unexpected line on screen. When we get the returned screen, and find under touch screen the display glass corner is broken…

in red circuit the glass is broken, glass is very easy to be broken if pressure at corner

From the picture, I find its inside chip is so thin, and looks like made by glass, I think it should be Silicon, used to driver every line on the screen 🙂

For DIYer, please be very careful when install this part, only 0.2mm so it can not stand any force. We will also be very careful when package them.

Screen: 4inch Increase Backlight Brightness

Because current 4inch screen(based on driver board v10a) is designed for very low power usage and intend to be long life time, so we have to limit its backlight brightness to save power. But currently maybe people do not care about the power usage and backlight lifetime, so I write this blog to provide a solution.

v10a driver board has a 1210 size resistor, normally on its top marked 20R0 or 200. It is 20ohm resistor(red arrow).

v10a version

Change that 20ohm resistor to 1ohm resistor will be able to make it brightness to max, and its output current will be 160mA. Do not use smaller than 1ohm resistor, backlight will burn in a short time… and do not ask me how I know that. :’) 160mA should be its max safe current for 1~2 year usage — I did not test.

After the modify, it will be much brighter than the original version. But any magic has a cost, this will reduce 75% LED life time and much increase power consume, the driver board will become pretty hot, from my test, increase around 15C, current consume from 0.12w to 0.25w.

PS: this modification is not easy for beginner, need a hot air gun and some glue, if action not careful enough, might melt the connector, DIY is always dangerous, be careful 🙂

5inch(v7a) also has a way to increase brightness, need to change one resistor from 10ohm to 5ohm to double its current. From my test, it do not have big difference, not worth to do the change.