Recently chip price is even crazy. Our screen main chip price increased 60%…and screen driver chip price increased 100%.
We have to increase VoCore2 4inch Screen price from 35.99USD to 37.99USD, 5inch Screen from 52.99USD to 53.99USD in order to cover the crazy increased cost more or less.
We promise once chip price back to normal, we will reduce the price to normal too. Sorry about this, hopefully this crazy chip shortage will end soon.
Update 20230222: SimHub WinUSB driver link https://simhubdash.com/Drivers/VOCOREScreenSetup.exe
Update 20220604: Please use zadig to install libusb driver, new tutorial here http://vonger.cn/?p=15204 or use WinUSB driver from SimHub. They are much stable than libusbK driver.
Recently everyday we get a lot of emails about screen can not work after USB plugin. I have to write this tutorial as people said there is no tutorial …
PS: I think this should be Simhub developer job? 🙂
First of first, plugin the microUSB cable to screen and another side to the computer. VoCore Screen requires a very good USB cable, because it will send data at max USB 2.0 speed, over 300MHz, even faster than most DDR data line.
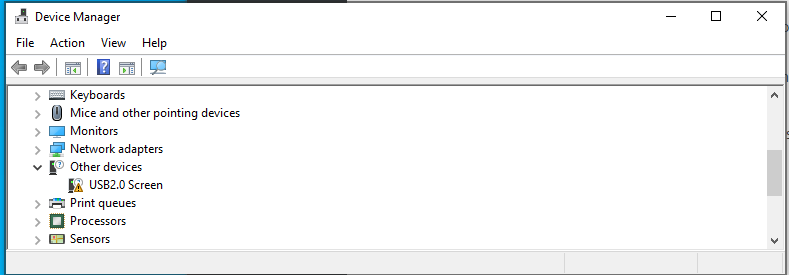
You will find the screen in your device manager, means it is connected.
USB2.0 Screen is our VoCore Screen
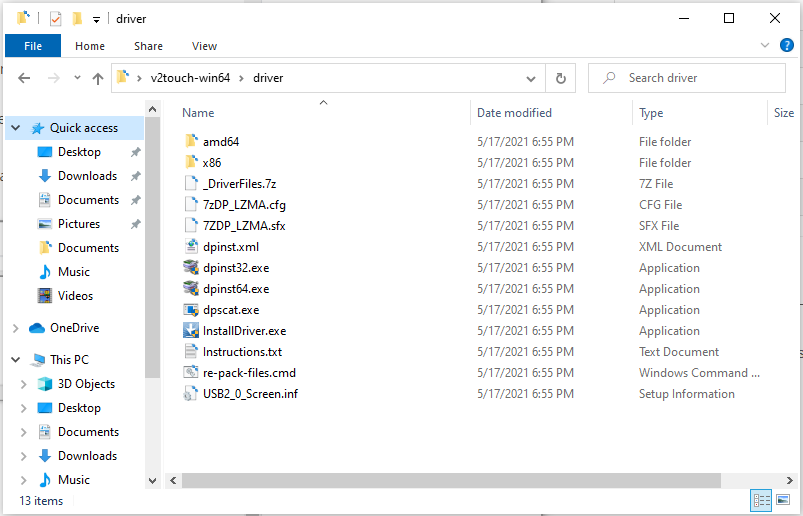
Next, let’s install its driver. Download it here: http://vonger.cn/misc/screen/v2touch-win64.zip
run InstallDriver.exe
Uncompress the zip file, and run InstallDriver.exe in its driver folder.
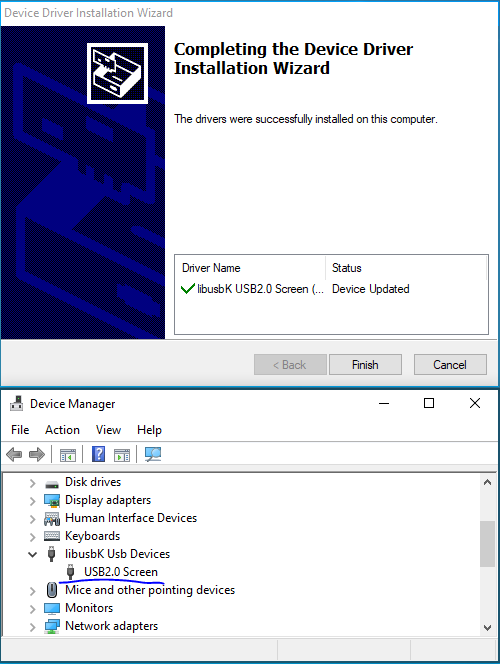
a few seconds, install completed
After install completed, you will find the device is working now. Under libusbK Usb Device => USB2.0 Screen
Test, now everything is ready, we can run screen_test.exe in the driver package, check if the screen is able to show something, also screen_test can be used to check if touch screen is working normal.
Final, run SimHub
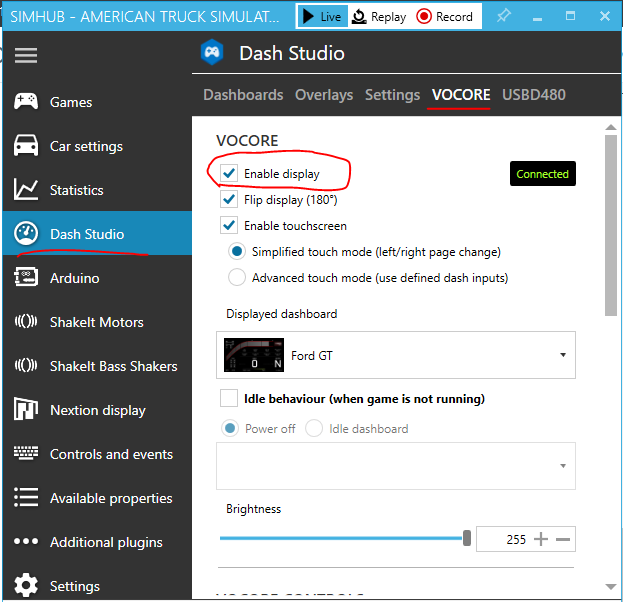
You will need to enable VoCore Screen first.
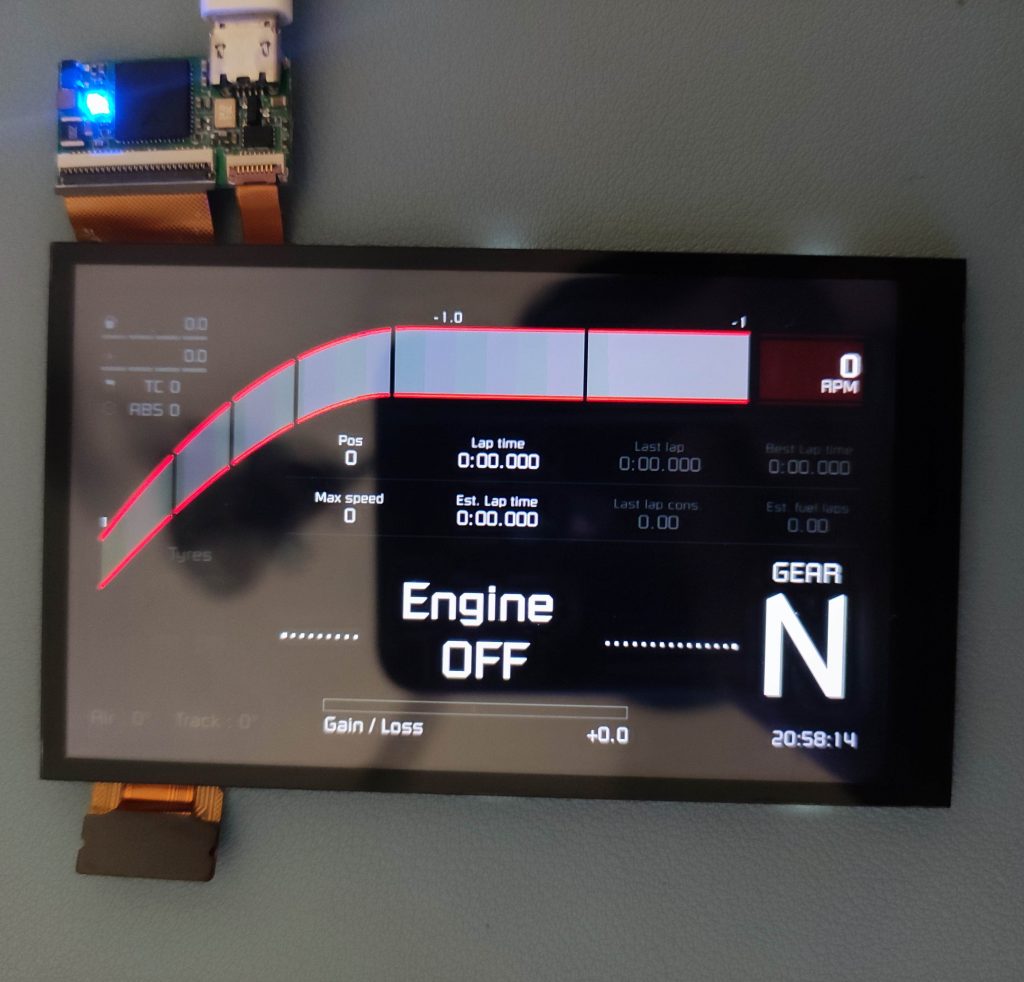
Click on Dashboard => VoCore => Enable display, once it shows connected, in a few seconds you will see the dashboard show in VoCore Screen.
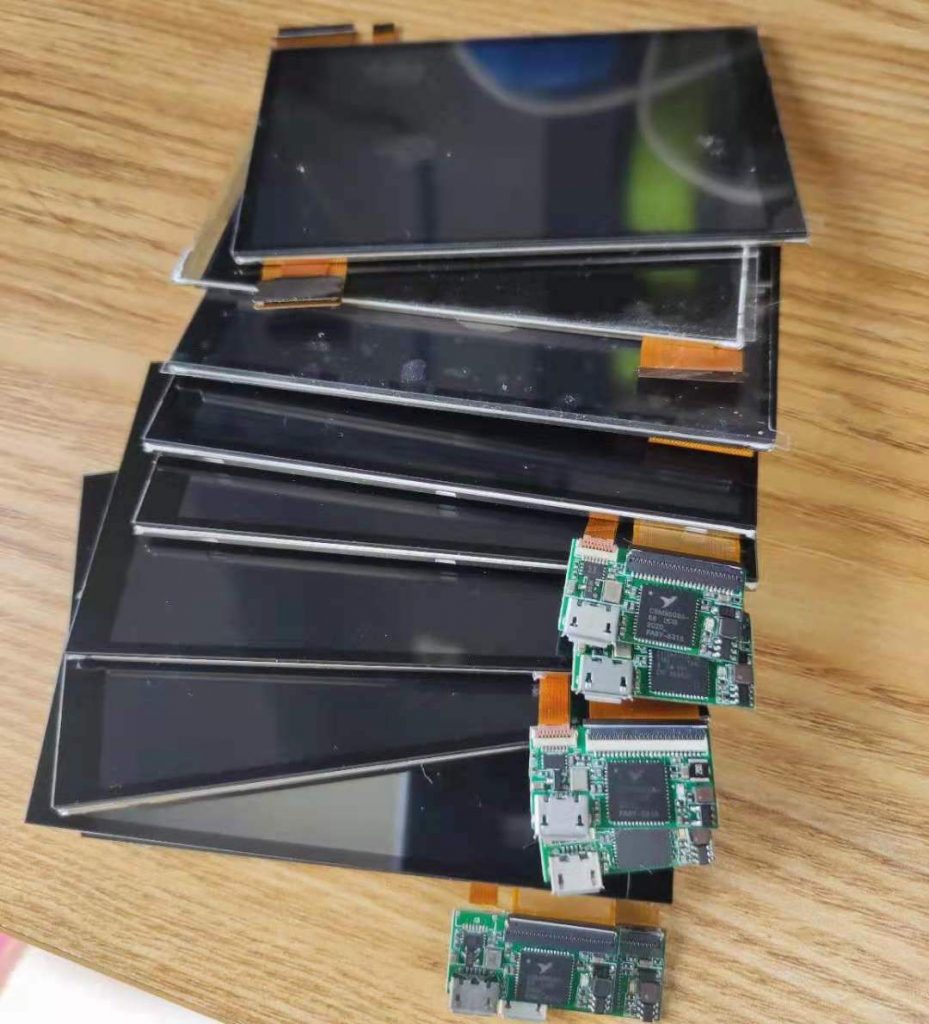
Recently I get around 10pcs broken ones returned. Is it really the mystery ESD problem or something else? Let’s analyze one by one check what is the problem. Hopefully this blog will also help DIYer find a way to solve such problem.
some broken screens.
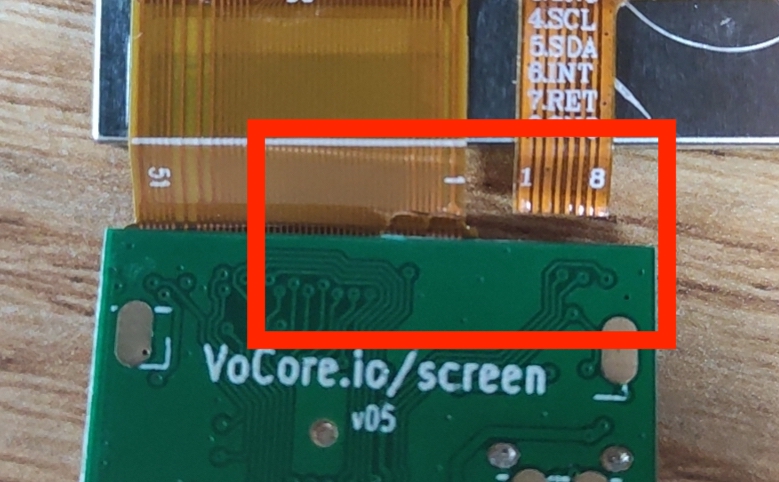
1.Obvious physics broken ones:
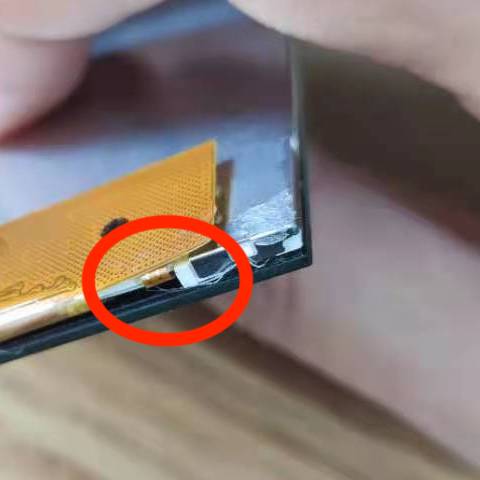
Four screens has such problem. Red rectangle area is the weak point.
Left FPC 51p is for screen and right 8p is for touch screen. From the picture, the 51p and 8p both tear off by force. FPC is something like tape, it is afraid of sharp edge. Such problem normally happens when you bend the FPC hard, and FPC touch the PCB or the connector edge, it will be easily broken.
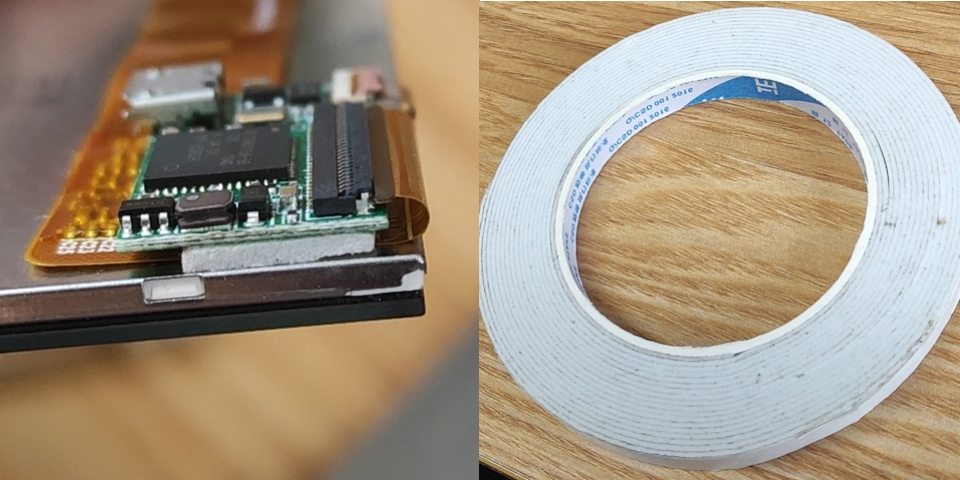
Recommend: FPC better to have a beautiful round corner, this will reduce tear off chance, also use the bubble tape around 1mm to stick it to PCB or back, NOT recommend use the hot melt adhesive, it is bad to fix the PCB because there are so less margin after it becomes solid, that will cause it easy to broken FPC.
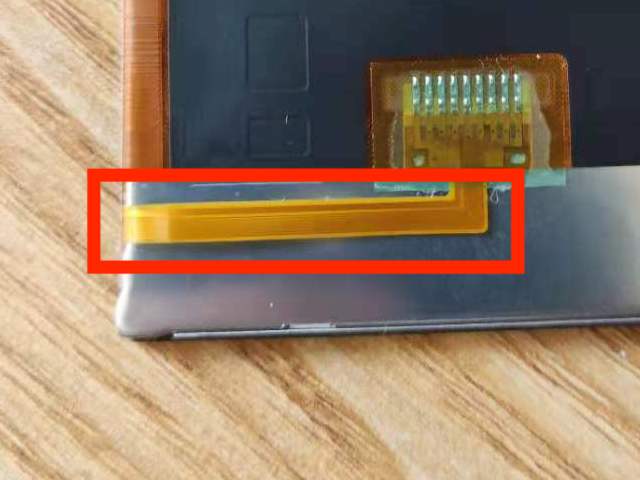
2. Hidden Physics Broken
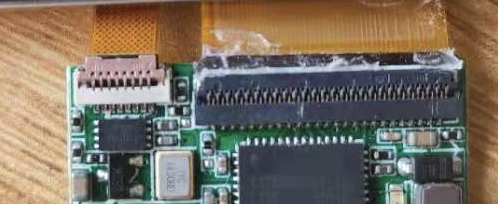
This screen problem is when we run test application send_frame frame.dat, its backlight will not able to turn on. One of broken screen is such problem. After remove its touch screen, I find the FPC is normal, but the liquid crystal driver chip is shattered. That driver chip is like a very thin glass, and when people is trying to force the glue on FPC off its holder, it will have very high chance to broken that chip.
PS: this part debug is a pain, last year on another project we use this screen, around 20pcs broken because of such problem, workers mistake stick the bubble tape to this area so when we remove the screen to repair other parts the screen broken by the force.
Recommend: tape or adhesive leave far away from this area! Do not touch this FPC at install. New version screen do not have such problem, but we still suggestion do not put any tape or adhesive on the FPC area, it should be only on the steel part.
3. Not Well Connected
adhesive inside connector, caused it not well connected.
One broken because of this reason, this screen also has FPC tear off problem.
Recommend: please do not use adhesive… 🙁
4. Firmware Problem
Rest screens are all such problem. This problem I never expected. That just is the unknown device problem. This should not happen if the screen is operated normally, I guess maybe some client side code has bug, I will check with SimHub developer.
For my MacOS or Linux, we have lsusb command, it will show the device like this:
Bus 020 Device 005: ID 04b4:8613 Cypress Semiconductor Vendor-Specific Device
If firmware is normal, it should be like this:
Bus 020 Device 011: ID c872:1004 c872 USB2.0 Screen
The firmware is written in EEPROM, and it should never lost any data unless client side application write something wrong to it…This is very weird.
I attached the firmware loader(download here), this application only run in MacOS.
For PCB version v05 and v07a, please call
./eeprom w ./FW200502-4IN14V.bin
For PCB version v10a, please call
./eeprom w ./FW210105-4IN3V3
After firmware upload completed, disconnect and reconnect the USB cable, all of the screens has such problem are fixed.
So the final result, none of the driver board are really broken 🙂 Just the physics broken screen we can not fix have to change screen. All 10 of them are repaired.
5. USB cable problem
This is not belong to this part but also very important, please use a short or well covered USB cable. This screen used max USB speed, every data line is 480MHz, so a bad quality USB cable will not make it work, will cause sometimes the screen can not be recognized or show some random noise on the screen. We also think the firmware is broken by this way. This need to be confirm.