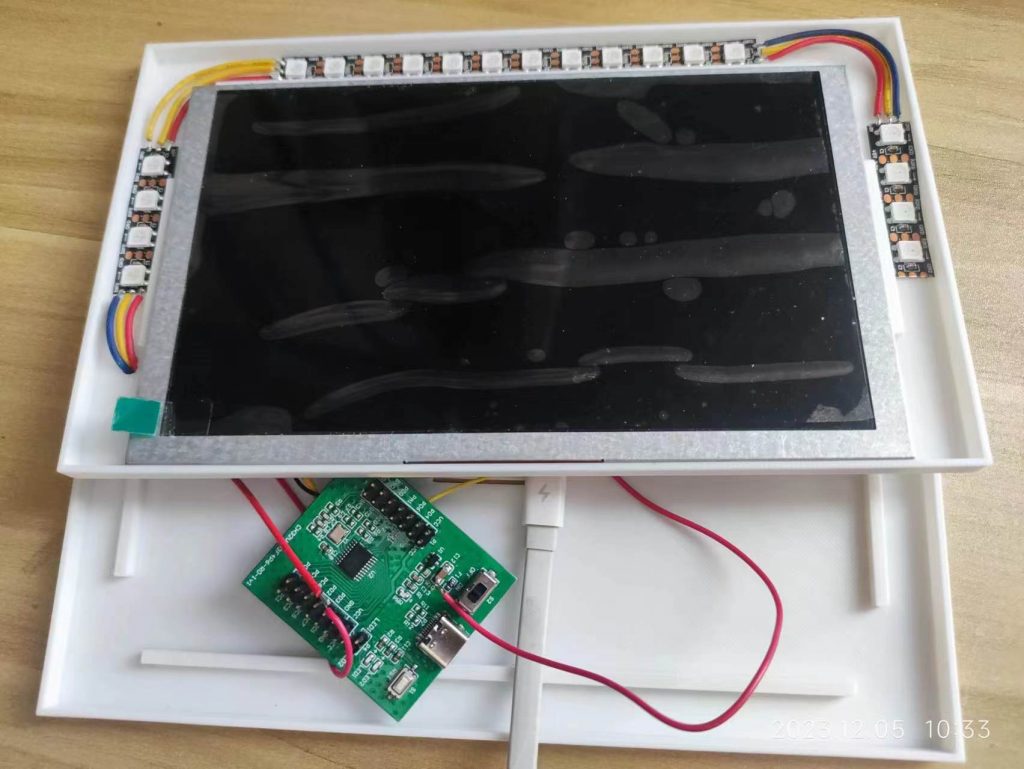
Author Archives: vonger

VoCore2 Screen: Run on RaspberryPi

Prepare System

sudo apt update && sudo apt upgrade -y
sudo apt install raspberrypi-kernel-headers build-essential -y
sudo reboot

Download & Compile & Install Driver

git clone https://github.com/Vonger/vocore2 # download code
cd vocore2
cd utils/fbusb/src
make -C /usr/src/linux-headers-`uname -r`/ M=`pwd` modules # compile
sudo mkdir -p /lib/modules/`uname -r`/extra
sudo cp fbusb.ko /lib/modules/`uname -r`/extra/ # install module
sudo depmod -a # load at bootup

Install XORG Configuration File

sudo cp /etc/X11/xorg.conf /etc/X11/xorg.conf.bak
sudo nano /etc/X11/xorg.conf

Paste the code to the end of the file.

Section "Device"
	Identifier      "vocore screen"
	Driver          "fbturbo"
	Option          "fbdev" "/dev/fb0"

	Option          "SwapbuffersWait" "true"
EndSection

Ready to Use

  1. plugout hdmi cable
  2. connect vocore screen
  3. reboot raspberrypi board
  4. the graphic will display on vocore screen by default (test on rpi4)

Here is a video about the performance.

VoCore2 + Screen: Wireless Display SimHub

Some people asked about if it is possible to make VoCore Screen wirelessly, so no need USB or any connection. I think there is such possible, because in Linux we have USBIP which can remotely connect USB by ethernet or wireless. In windows, it also has one named VirtualHere but not open source.

Then we tried the solution, the result…emm, it works but FPS is not high, for simple page like system information or not frequently changed dashboard, it is stable and good(but we did not have game for real test)

Here is a tutorial about how to try it:

Install VirtualHere on Windows PC

Download link here: https://www.virtualhere.com/usb_client_software

win32: https://www.virtualhere.com/sites/default/files/usbclient/vhui32.exe
win64: https://www.virtualhere.com/sites/default/files/usbclient/vhui64.exe

Install VirtualHere on VoCore2

VoCore2 is MIPSEL, so we need to use

https://www.virtualhere.com/sites/default/files/usbserver/vhusbdmipsel

And here is a compiled firmware for VoCore2, after upgrade you can directly use. https://vonger.cn/upload/vocore2.virtualhere.bin

Connect VoCore2 and Your PC

VoCore2 and Your Computer must in same network. About network setting, please search VoCore2 tutorial in this site.

Open VirtualHere application on your PC, wait a moment, normally it will be detected and show in the menu, VoCore2 automaticlly when they are in same network. Once it shows in the menu, right click and select use the device, then you can use the screen just like it is connected to your computer. Later we will upload a video about how it performance.

OpenWrt: Build dependency problem

Recently compile openwrt 18.06.9, get this error:

Build dependency: Please install the GNU C Compiler (gcc) 4.8 or later
Build dependency: Please install the GNU C++ Compiler (g++) 4.8 or later

I can not do any further process. But my GCC is pretty new 11.3.0

gcc --version
gcc (Ubuntu 11.3.0-1ubuntu1~22.04) 11.3.0
Copyright (C) 2021 Free Software Foundation, Inc.
This is free software; see the source for copying conditions.  There is NO
warranty; not even for MERCHANTABILITY or FITNESS FOR A PARTICULAR PURPOSE.

So its report is absolutely something not right.

PS: I already can image some lazy coder just compare the first byte of gcc version, so it must think my gcc version is ‘1.x’ but not ’11.x’, so report such stupid error.

Easy to fix, just delete the check it will back to work, I have checked by my eye it is 11.x but not 1.x. Sorry about this dirty fix, I am also one of the lazy coder and even worse I am not good at script. :p

--- a/include/prereq-build.mk
+++ b/include/prereq-build.mk
@@ -26,31 +26,12 @@ $(eval $(call TestHostCommand,proper-umask, \
        Please build with umask 022 - other values produce broken packages, \
        umask | grep -xE 0?0[012][012]))
 
-$(eval $(call SetupHostCommand,gcc, \
-       Please install the GNU C Compiler (gcc) 4.8 or later, \
-       $(CC) -dumpversion | grep -E '^(4\.[8-9]|[5-9]\.?|10\.?)', \
-       gcc -dumpversion | grep -E '^(4\.[8-9]|[5-9]\.?|10\.?)', \
-       gcc --version | grep -E 'Apple.(LLVM|clang)' ))
-
 $(eval $(call TestHostCommand,working-gcc, \
        \nPlease reinstall the GNU C Compiler (4.8 or later) - \
        it appears to be broken, \
        echo 'int main(int argc, char **argv) { return 0; }' | \
                gcc -x c -o $(TMP_DIR)/a.out -))
 
-$(eval $(call SetupHostCommand,g++, \
-       Please install the GNU C++ Compiler (g++) 4.8 or later, \
-       $(CXX) -dumpversion | grep -E '^(4\.[8-9]|[5-9]\.?|10\.?)', \
-       g++ -dumpversion | grep -E '^(4\.[8-9]|[5-9]\.?|10\.?)', \
-       g++ --version | grep -E 'Apple.(LLVM|clang)' ))
-
-$(eval $(call TestHostCommand,working-g++, \
-       \nPlease reinstall the GNU C++ Compiler (4.8 or later) - \
-       it appears to be broken, \
-       echo 'int main(int argc, char **argv) { return 0; }' | \
-               g++ -x c++ -o $(TMP_DIR)/a.out - -lstdc++ && \
-               $(TMP_DIR)/a.out))
-
 $(eval $(call TestHostCommand,ncurses, \
        Please install ncurses. (Missing libncurses.so or ncurses.h), \
        echo 'int main(int argc, char **argv) { initscr(); return 0; }' | \

PS: I meet tons of problem after this, like m4 compatible error, and gdb8 need python2, so for simple, just download latest openwrt and copy the tools Makefile to replace the old bones, it will back to work.

VoCore2: Use UBOOT Latest Version

Currently latest version of uboot is working well on VoCore2. But because of the partition is not big enough for all uboot features, we have to do such cut off.

We upload the config to https://github.com/Vonger/vocore2/blob/master/uboot/vocore2_defconfig

Have a try 🙂 https://vonger.cn/misc/vocore2/u-boot-with-spl.bin

1. This is for 192KB partition of uboot, for mainline version you will need to adjust the uboot partition size to 312KB, but that will also need to modify Linux partition DTS file.

This define is in vocore2_defconfig of uboot: CONFIG_MTDPARTS_DEFAULT=”spi0.0:192k(u-boot),64k(env),64k(factory),-(kernel)”

2. uboot will not boot Linux after install, you will need to setup, choose and run one of the following uboot commands.

=fast bootup=========================
setenv bootcmd 'bootm 0xbc050000'
saveenv
reset
=common bootup=========================
setenv bootcmd 'sf probe; sf read ${loadaddr} 0x50000 0x200000; bootm;'
saveenv
reset

Note: it works after setup env, common bootup pretty slow at load firmware, take totally 15s to load Linux then unzip. fast bootup has limit, your compressed kernel can not >4MB

Note: 0xbc000000 is flash map to memory, and first 0x50000 we used for uboot and factory, so start at 0xbc050000

mainline uboot support

Now VoCore2 has mainline uboot available, but need more testing to verify that everything is stable.

if you need it, see below:

before replace uboot ,you need read how to fix dead uboot: https://vonger.cn/?p=8054

flash layout difference of mainline uboot and ralink uboot:

mainline uboot:

ubootuboot-envfactoryfirmware
312k4k4k

uboot from mtk:

ubootuboot-envfactoryfirmware
192k64k64k

mainline uboot’s layout can include more code in uboot, but it not compatible with the mtk’s uboot.

if you need 192k mainline uboot, please use uboot/vocore2_defconfig to compile maineline uboot:

cp path/to/thisrepo/uboot/vocore2_defconfig path/to/mainlineubootsrc/.config

note: before replace uboot, you must ensure your ‘u-boot-with-spl.bin’ size is < 192k

To support mainline of the uboot, also need to modify Linux kernel partition DTS. openwrt/target/linux/ramips/dts/mt7628an_vocore_vocore2.dts

                        partition@0 {
                                label = "u-boot";
                                reg = <0x0 0x4e000>;
                                read-only;
                        };

                        partition@30000 {
                                label = "u-boot-env";
                                reg = <0x30000 0x1000>;
                                read-only;
                        };

                        factory: partition@40000 {
                                label = "factory";
                                reg = <0x40000 0x1000>;
                                read-only;
                        };

PS: before do anything change to your VoCore, better to backup the hole flash to avoid any calibrate data lost.

PayPal locked our account today

PayPal just locked our account this morning, no reason provide and no idea, they required us submit a lot of paperwork to prove our business is real. We have submitted in first time but seems like the review still need three days.

Possible reason: our sales agent is locked at home because of virus and their home network is very slow to login PayPal, so around one week we can not fill trace on PayPal(but we do have trace on our site…)

For recently order, please directly email to sales@vocore.io, so we have to use old way to handle this, email and wire transfer to our company account.

If any other good third party to replace PayPal please suggest. 🙂 Sometimes we are just too lazy to take action but seems like this time we have to move, PayPal is very expansive and not friendly to seller anymore.

PS: at Nov.20, our account is unlocked. But the our stock distinct is locked because of COVID…It is so hard this year. :'(

VoCore2: Boot from memory/USB

Sometimes we need to do some test fast, or test new system like ECOS, so maybe boot from flash is not a good idea, it is slow to write and load. Then maybe good idea is boot from memory.

First, enable ramdisk from openwrt menuconfig, this is default enabled normally.

If not, it is at make menuconfig => Target Images => [*] ramdisk

After setup and compile, you will find openwrt-ramips-mt76x8-vocore_vocore2-initramfs-kernel.bin at openwrt/bin/targets/ramips/mt76x8 folder.

Then we can copy it to a USB disk which formatted in FAT(because default uboot only support this disk format), rename to ram.bin (because FAT might not good at support too long file name)

Plug the usb disk to your VoCore2, and power on it. When uboot menu shows up from UART, press 4 to entry uboot command console. Then call “usb start” to enable usb, “usb storage” to load usb disk, “fatload usb 0:1 0x81000000 ram.bin” to load ram.bin to memory and final “bootm 0x81000000 ” to boot from memory.

PS: if your flash is 32MB or more, need to modify start address.

The log I attach here:

flash manufacture id: ef, device id 40 18                                       
find flash: W25Q128BV                                                           
============================================                                    
Ralink UBoot Version: VOCORE2                                                   
--------------------------------------------                                    
ASIC 7628_MP (Port5<->None)                                                     
DRAM component: 1024 Mbits DDR, width 16                                        
DRAM bus: 16 bit                                                                
Total memory: 128 MBytes                                                        
Flash component: SPI Flash                                                      
Date:Aug  8 2019  Time:16:16:35                                                 
============================================                                    
icache: sets:512, ways:4, linesz:32 ,total:65536                                
dcache: sets:256, ways:4, linesz:32 ,total:32768                                
                                                                                
 ##### The CPU freq = 575 MHZ ####                                              
 estimate memory size =128 Mbytes                                               
RESET MT7628 PHY!!!!!!                                                          
Please choose the operation:                                                    
   0: Load system code then write to Flash via Serial.                          
   1: Load system code to SDRAM via TFTP.                                       
   2: Load system code then write to Flash via TFTP.                            
   3: Boot system code via Flash (default).                                     
   4: Entr boot command line interface.                                         
   5: Load system code then write to Flash via USB Storage.                     
   7: Load Boot Loader code then write to Flash via Serial.                     
   9: Load Boot Loader code then write to Flash via TFTP.                       
   r: Reset firmware to first boot.                                             
                                                                                
You choosed 4                                                                   
                                                                                
 0                                                                              
                                                                                
                                                                                
4: System Enter Boot Command Line Interface.                                    
                                                                                
U-Boot 1.1.3 (Aug  8 2019 - 16:16:35)                                           
MT7628 # usb start                                                              
(Re)start USB...                                                                
USB0:   *********ehci_hcd_init**********                                        
Mediatek/Ralink USB EHCI host init hccr b01c0000 and hcor b01c0010 hc_length 16 
 6. u2phydcr0(0xb0120860)=0x00aaaa02                                            
 FM_OUT value: u4FmOut = 0(0x00000000)                                          
 FM_OUT value: u4FmOut = 149(0x00000095)                                        
 FM detection done! loop = 1                                                    
 SR calibration value u1SrCalVal = 5                                            
                                                                                
                                                                                
Register 1111 NbrPorts 1                                                        
USB EHCI 1.00                                                                   
scanning bus 0 for devices... 2 USB Device(s) found                             
       scanning bus for storage devices... 1 Storage Device(s) found            
MT7628 # usb storage                                                            
  Device 0: Vendor: Generic  Prod.: STORAGE DEVICE   Rev: 0272                  
            Type: Removable Hard Disk                                           
            Capacity: 29862.0 MB = 29.1 GB (61157376 x 512)                                                                    
MT7628 # fatload                                                                
usage: fatload <interface> <dev[:part]> <addr> <filename> [bytes]               
MT7628 # fatload usb 0:1 0x81000000 ram.bin                                     
reading ram.bin                                                                 
...                                                                             
................................................................................
..                                                                              
                                                                                
5420311 bytes read                                                              
MT7628 #                                                                        
MT7628 # bootm 0x81000000                                                       
## Booting image at 81000000 ...                                                
   Image Name:   MIPS OpenWrt Linux-5.4.215                                     
   Image Type:   MIPS Linux Kernel Image (lzma compressed)                      
   Data Size:    5420247 Bytes =  5.2 MB                                        
   Load Address: 80000000                                                       
   Entry Point:  80000000                                                       
   Verifying Checksum ... OK                                                    
   Uncompressing Kernel Image ... OK                                            
No initrd                                                                       
## Transferring control to Linux (at address 80000000) ...                      
[    0.000000] Linux version 5.4.215 (...)
[    0.000000] Board has DDR2                                                   
[    0.000000] Analog PMU set to hw control                                     
[    0.000000] Digital PMU set to hw control                                    
[    0.000000] SoC Type: MediaTek MT7628AN ver:1 eco:2                          
[    0.000000] printk: bootconsole [early0] enabled                             
[    0.000000] CPU0 revision is: 00019655 (MIPS 24KEc)                          
[    0.000000] MIPS: machine is VoCore2                                         
[    0.000000] Initrd not found or empty - disabling initrd                     
[    0.000000] Primary instruction cache 64kB, VIPT, 4-way, linesize 32 bytes. 

VoCore2 Super: Combine Ultimate/PoE

This version I planed a long time, but because it is super hard, tried many times all failed. I faced many problems:

  1. PoE voltage is 50V~60V but VoCore2 is only 5V, how to protect VoCore2 from outside noise or unexpect high voltage(like lighting from ethernet)?
  2. PoE heat is pretty much, VoCore2 Ultimate already very small, how to reduce the heat without a fan?
  3. PoE use a lot of parts, include a big cap(electrolytic capacitor), such high voltage cap(100V) we do not have small part as replacement. Also such cap can not stand high temperture or its life time will be reduce a lot. How to place it into so limited space?
  4. We have low speed signal like I2C; high speed signal like USB, SDXC, ethernet; analog signal for sound card headphone output, micphone input and high voltage power input, low voltage power output, how to arrange them into only coin sized space without a war?
  5. Ethernet need transformer which is big; PoE need two diode bridge which is big; Sound card, USB2TTL, POE power convert chip, and their capacitor, all are space eater.

Finally I find a way to make it work 🙂 This is a really adventure. Later blog will explain how I did it.

Screen: Special Command

The screen has some special commands which can be used to control its brightness and flip the screen, but because the command is not compatible for all type of screen, so test it before use it. Here is a reference for use such command.

For fbusb driver, we have a file named command in /sys folder, we can use it to send the command.

# turn off backlight
echo -e '\x00\x51\x02\x00\x00\x00\x00\x00' > `find /sys/devices/platform/ -name command`
# set backlight brightness to max
echo -e '\x00\x51\x02\x00\x00\x00\xff\x00' > `find /sys/devices/platform/ -name command`
# set backlight brightness to 128(half)
echo -e '\x00\x51\x02\x00\x00\x00\x80\x00' > `find /sys/devices/platform/ -name command`

Here is an example of libusb.

#include <stdio.h>
#include <stdlib.h>
#include <memory.h>

#include <libusb-1.0/libusb.h>

static libusb_context *context = NULL;
static libusb_device_handle *handle = NULL;

unsigned char cmd_rotate[] = {0x00, 0x36, 0x02, 0x00, 0x00, 0x00, 0x00, 0x00};
unsigned char cmd_backlight[] = {0x00, 0x51, 0x02, 0x00, 0x00, 0x00, 0x00, 0x00};

int main(int argc, char *argv[])
{   
    if (argc != 3) {
        printf("usage: send_cmd [cmd: m|b] [param]\n");
        printf("example: mirror by axis x,y [0,1,2,3]\n\tsend_cmd m 1\n");
        printf("example: set backlight [0~255]\n\tsend_cmd b 120\n");
        return 0;
    }
    
    libusb_init(&context);
    handle = libusb_open_device_with_vid_pid(context, 0xc872, 0x1004);
    if (handle == NULL) {
        printf("no device.\n");
        return -1;
    }

    libusb_claim_interface(handle, 0);
    libusb_set_interface_alt_setting(handle, 0, 0);
    
    switch (argv[1][0]) {
    case 'm':
        cmd_rotate[6] = atoi(argv[2]);
        libusb_control_transfer(handle, 0x40, 0xb0, 0, 0, cmd_rotate, 8, 100);
        break;
        
    case 'b':
        cmd_backlight[6] = atoi(argv[2]);
        libusb_control_transfer(handle, 0x40, 0xb0, 0, 0, cmd_backlight, 8, 100);
        break;
        
    default:
        printf("command is not supported.");
        break;
    }
        
    libusb_release_interface(handle, 0);
    libusb_close(handle);
    libusb_exit(context);
    return 0;
}

Also please check https://vocore.io/screen.html, the v2scrctl source code for libusb.

Screen: I2C to Drive RGB LEDs

Currently our V7B board has I2C interface exported, and actually we can control it through USB port.

Note: This I2C mainly is used for upgrade firmware on the usb bus, so it might be risk to use, if you send wrong data to it, it might broken firmware.

Here is the I2C API, only three commands:

#define CMD_SCREEN_I2C          0xb5
#define CMD_SCREEN_I2C_WR 0xb6
#define CMD_SCREEN_I2C_RD 0xb7

0xb5 [i2c address 1byte] [write size 1byte] [read size 1byte] [write data …] this is used to tell i2c bus how many data we will write and how many data we will read then follows the data we will write to i2c, that data will save to a buffer.

0xb6 [i2c address 1byte] this is used to trigger write, send address to it then I2C will write data from its buffer to external device.

0xb7 this is used to read the data from device i2c, it will return the required data bytes(0xb5 read size) max one time can send/receive 58 – 5 = 53bytes, so for data better not to exceed 53 bytes.

Here is the example of writing data to I2C EEPROM, BLOCK_SIZE = 16.

        if (load_from_file(argv[2], buf, 0x2000) < 0) {
            printf("no firmware file.\n");
            return -1;
        }
        
        for (pos = 0; pos < 0x2000; pos += BLOCK_SIZE) {
            cmd[0] = EEPROM_ADDR;    // I2C address
            cmd[1] = BLOCK_SIZE + 2; // write 18 bytes for register address 2byte and data 16byte.
            cmd[2] = 0;              // read zero byte, no read for i2c write.
            cmd[3] = pos >> 8;       // write first byte, register address 
            cmd[4] = pos;            // write second byte, register address
            // put rest data to the buffer.
            memcpy(cmd + 5, buf + pos, BLOCK_SIZE);
            // send i2c command head to screen, require control the i2c bus.
            ret = libusb_control_transfer(handle, 0x40, CMD_SCREEN_I2C, 0, 0, cmd, BLOCK_SIZE + 5, 200);
            // write register address and data to i2c bus.
            ret = libusb_control_transfer(handle, 0xc0, CMD_SCREEN_I2C_WR, 0, 0, cmd, 1, 200);
            
            if (pos % 0x100 == 0) {
                printf(".");
                fflush(stdout);
            }
        }

Here is the example of reading data from I2C EEPROM

        for (pos = 0; pos < 0x2000; pos += BLOCK_SIZE) {
            cmd[0] = EEPROM_ADDR; // I2C address
            cmd[1] = 2;           // write two bytes for register address.
            cmd[2] = BLOCK_SIZE;  // read 16 bytes
            cmd[3] = pos >> 8;    // write data first byte
            cmd[4] = pos;         // write data second byte
            
            ret = libusb_control_transfer(handle, 0x40, CMD_SCREEN_I2C, 0, 0, cmd, 5, 200);
            // write register address to i2c bus.
            ret = libusb_control_transfer(handle, 0xc0, CMD_SCREEN_I2C_WR, 0, 0, cmd, 1, 200);
            // read data from i2c bus.
            ret = libusb_control_transfer(handle, 0xc0, CMD_SCREEN_I2C_RD, 0, 0, cmd, BLOCK_SIZE + 1, 200);
            
            memcpy(buf + pos, cmd + 1, BLOCK_SIZE);
            if (pos % 0x100 == 0) {
                printf(".");
                fflush(stdout);
            }
        }

With this I2C interface, we can easy control RGB LED driver chip like AW9523 and other chips. Then it will save a lot of cost make customized board, do not need arduino and USBhub chip anymore.

To be continue…

Screen: 7inch ready

After months hard work, the 7inch(6.8in exactly) screen is ready in time. 🙂

This screen is pretty special, because the screen main design target is for real car but not like our current 4inch/5inch screen for consumer usage. So it can stand even worse environment like hot area over 65C.

Here is its shape: