Daily Archives: 2014-11-20

VoCore: No LuCI 3

From last week, I am thinking of a super light weight web server.
There are many choices:
LuCI + uhttpd, goahead, mini-httpd, etc…

But none of them is perfect for me:

1. cgi part use too much resource.
Fork new child process to deal cgi, and dealing code with Lua. Calling script to create the html page. If I need update frequently, such as video, the board will die for out of memory or cpu 100%.

2. memory control low efficiency.
They call malloc for every memory request. For small memory device, such malloc is pain. It will generate tons of memory fragment, and the core have to arrange them, costs lots of resource.

3. unnecessary optimisation.
We just has one core, so whatever the optimisation you do, remember the most effect way is to make the app run in one thread.
Such on board web server do not have to deal with many people request same time, so use why use pthread? Looks like the reply time is shorter, but underground it costs two times of CPU time, if the load is heavy, it is twice slower.

4. take too much disk(flash) space.
goahead, after I compile it, the size goes to 850KB, and even not contains its dependency library.

So same reason as I make VoCore, I write something looks better to me.

1. advanced memory control.
Only 12KB or even lower memory request. Self maintain memory, do not create memory fragment.

2. optimisation for one core cpu.
The full application only have just one thread, no switch cost.

3. cgi write in pure C code.
This makes it more effective, no middle layer. Pure server, client mode.

4. super fast.
deal 60~80/sec request on VoCore.

5. minimised dependency
Only basic C library is necessary. Do not need pthread, libdl, etc.

6. small executable file size.
After compile, it is 33KB, and do not need addition library. That’s all.

7. source code in one file.
I like sqlite3 style, so I make all files into one file, easy to compile.

This VoWebServer is very “embed”, of course, it is just a new project, many bugs have to be fixed, at least, we have one more choice. 🙂

Here is the source code, once I feel happy about it, will upload to github.
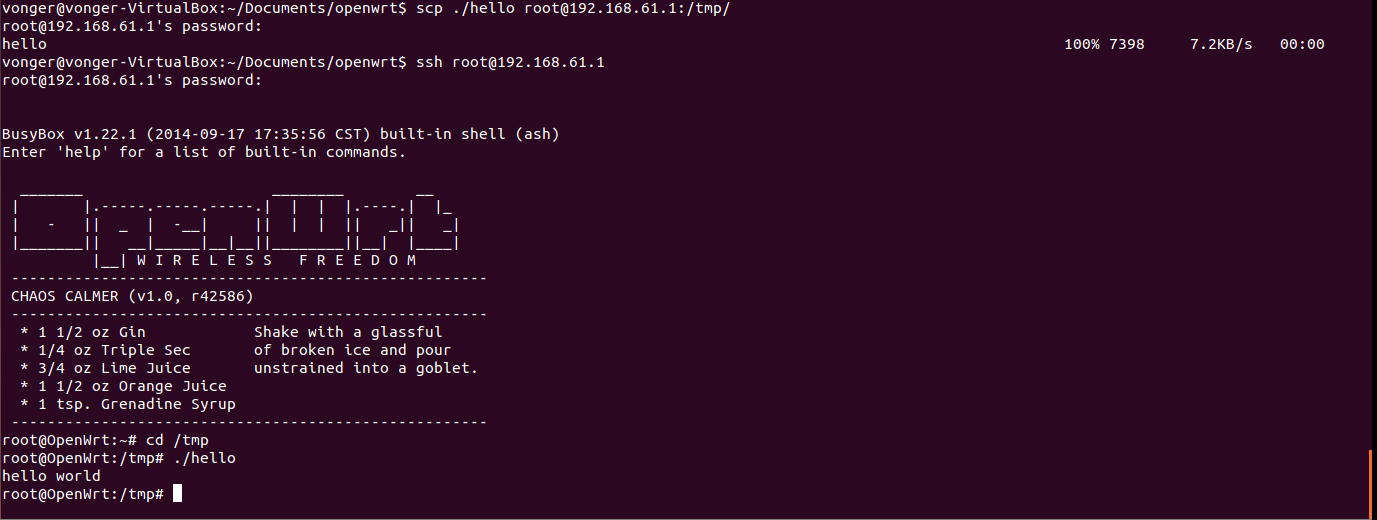
compile it by one line:

cc -g voweb.c -o voweb

Compiled one for VoCore: voweb

run it like this:(put some htmls to /var/www/html, it will get index.html)

voweb 8080 /var/www/html

Then open 192.168.61.1:8080, you will find the page 🙂
Test cgi function: http://192.168.61.1:8080/cgi-bin/love?VoCore
(cgi-bin folder do not exists)

VoCore: Starter Tutorial Part1

In this tutorial, I will show you the full process about setup a develop environment and compile/run a “hello world” on VoCore, step by step.

1. Prepare Linux
a) Download and install VirtualBox. VirtualBox is a famous open source VM software, I like it. If you are using Linux OS already, just ignore this.

https://www.virtualbox.org/wiki/Downloads

Screen Shot 2014-11-20 at 10.45.00 am

Click on the links, you will get the install package, run it to install VirtualBox into your computer. If you have VoCore you can not be a newbie to such thing.

b) Download Ubuntu. Ubuntu is the first UI Linux I used. I like the font 🙂

http://www.ubuntu.com/download/
Screen Shot 2014-11-20 at 10.47.38 am

After download, you will get the ubuntu install iso file.

c) Setup VirtualBox and install ubuntu into it.
Screen Shot 2014-11-20 at 10.51.24 am (2)

Better to have 30GB free disk space(at least 20GB).
Screen Shot 2014-11-20 at 10.51.38 am (2)

Click “Create”, then double click the new item in VBox.
It will popup a window request you to select the iso.
Now select your downloaded ubuntu iso, then click Start.
Screen Shot 2014-11-20 at 10.51.59 am (2)

Rest is the install Ubuntu, I will not post here, please check ubuntu.com for the install instruction.

d) Install VirtualBox driver to ubuntu.
After ubuntu installed and startup successfully, we have to install VirtualBox driver so we can use the network, etc in VM.

Details is here: https://www.virtualbox.org/manual/UserManual.html

Now we have a Linux system in VM.

2. Prepare OpenWrt.(http://vocore.io/wiki/index/id:15)

a) Install necessary tools:
sudo apt-get install zlib1g-dev libncurses5-dev gawk subversion libssl-dev git

b) Download openwrt
git clone git://git.openwrt.org/openwrt.git

c) Make & Compile
goto openwrt folder(git create that), for example: cd ~/openwrt
make menuconfig
Screen Shot 2014-11-20 at 11.07.52 am (2)
make sure the config is like upper picture.

call make to compile openwrt, or make -jX for faster speed.(X is your CPU core number +1, for my macbook pro, it is -j9)

3. Write your first application.
use vi or any text edit, create main.c.

#include <stdio.h>

int main(void)
{
    return printf("hello world\n");
}

Now there are two ways to compile your main.c
One is to write a makefile, put the file to openwrt package folder, I will show this way in later tutorial.

Another way is super simple 🙂 Just make sure main.c is in current folder.

`find . -name mipsel-openwrt-linux-gcc` -g main.c -o hello

Now you have the compiled application, hello.
Note: you might get this warning, just ignore that.

mipsel-openwrt-linux-gcc: warning: environment variable 'STAGING_DIR' not defined

4. Upload to VoCore

a) Connect to your VoCore.

Here is the tutoral

VoCore: Simple Start Tutorial 1

VoCore: Simple Start Tutorial 2

b) scp the file to VoCore, password vocore.

scp ./hello root@192.168.61.1:/tmp/

c) ssh to VoCore.

ssh root@192.168.61.1

d) Try to run your first app.
Works well 🙂
Screen Shot 2014-11-20 at 11.39.21 am (2)

Next tutorial, I will show how to remote control GPIO.