Monthly Archives: November 2014

VoCore: Package FAQ

There are mainly two type of packages:

VoCore
1. VoCore, main board version
a) 4x4p female connectors.
b) 4x7p female connectors.
c) USB convert to TTL, driver PL2302.

VoCore + Dock
2. VoCore + Dock
a) 1x4p female connectors.
b) 3x7p female connectors.
c) USB convert to TTL, driver PL2302.

What are those addition female connectors used to do?
They are used to solder on the pin holes to make them stand longer.
1.27mm female connectors are hard to find in some countries, so I add that to the package, but that is not necessary at all. From current report, the female connectors did not help much, just lead a few people broken down VoCore when they trying to solder the connectors. I am thinking to remove it in further package.
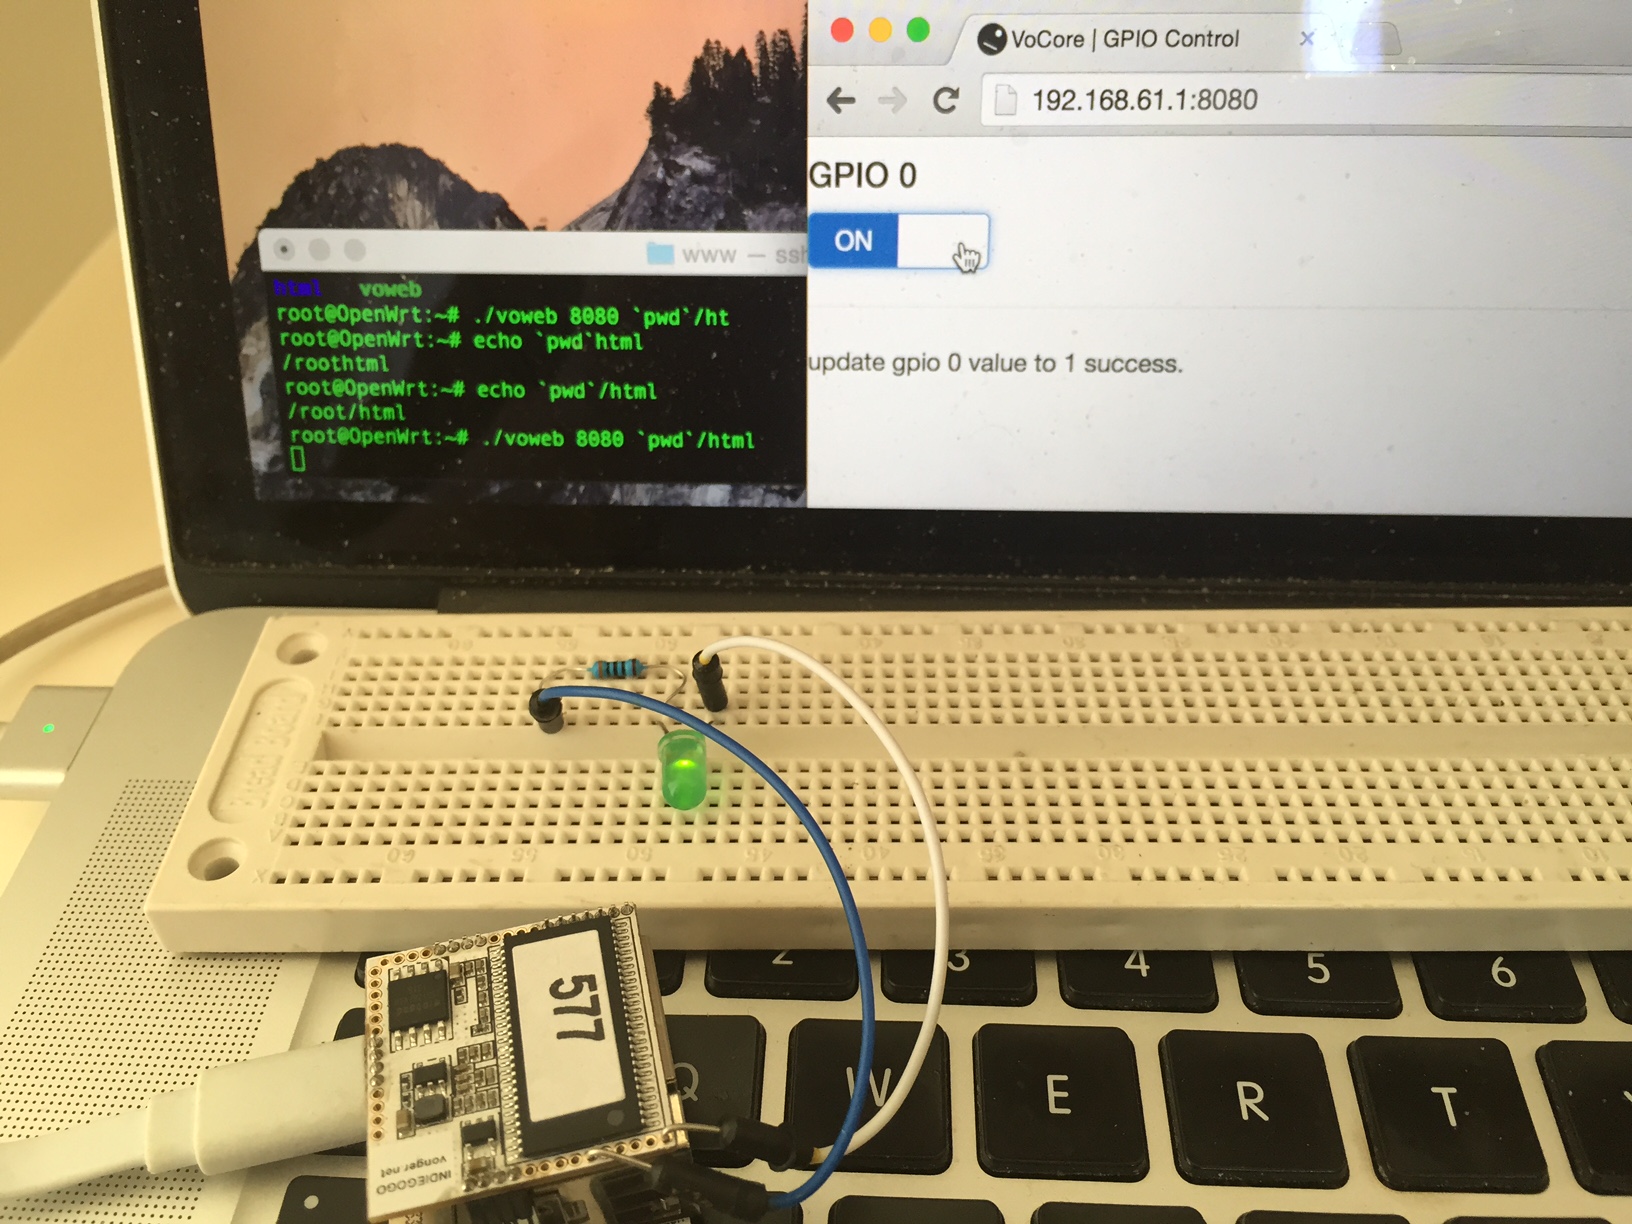
For beginner, a break out board is necessary, so people will not afraid of broken their little VoCore. πŸ™‚ I am on that now.

PS: I thought the buyers of VoCore should have enough skill to solder that, but I am totally wrong. That’s my bad. πŸ™‚

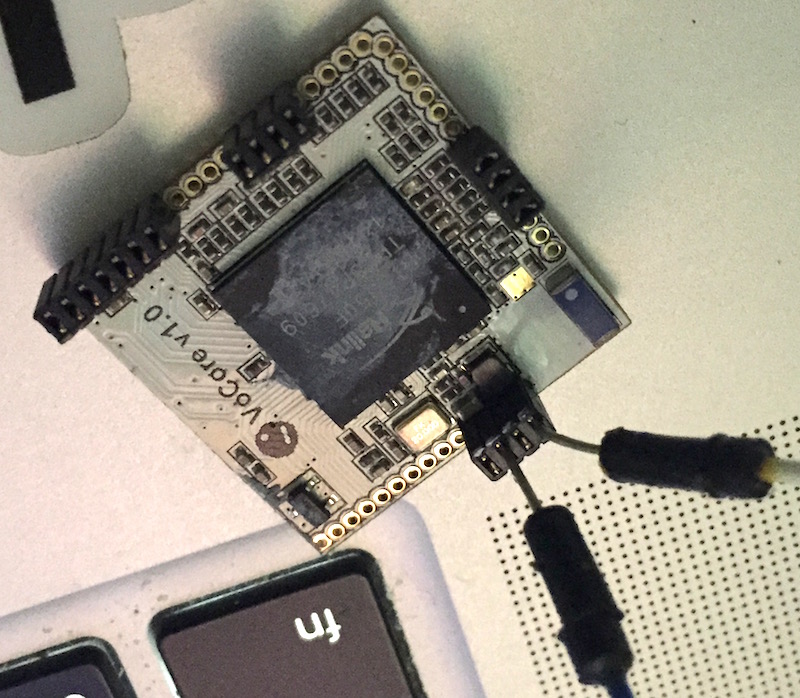
What is that USB2TTL used to do?
That USB2TTL is very important. It helps you repair the bricked VoCore by uboot or connect to VoCore when your wifi or ethernet do not work.
When I write driver for VoCore, I always make stupid mistake, such as system can not reboot or too heavy CPU load, make the wifi can not work normal. For such situation, USB2TTL is the only way to connect to VoCore(maybe JTAG is fine too, but I did not try).

Next version I will consider to add USB2TTL chip to dock, but the space on dock is so limited, that QFN chip + slot parts is not easy to assemble.
This move must be very careful πŸ™‚

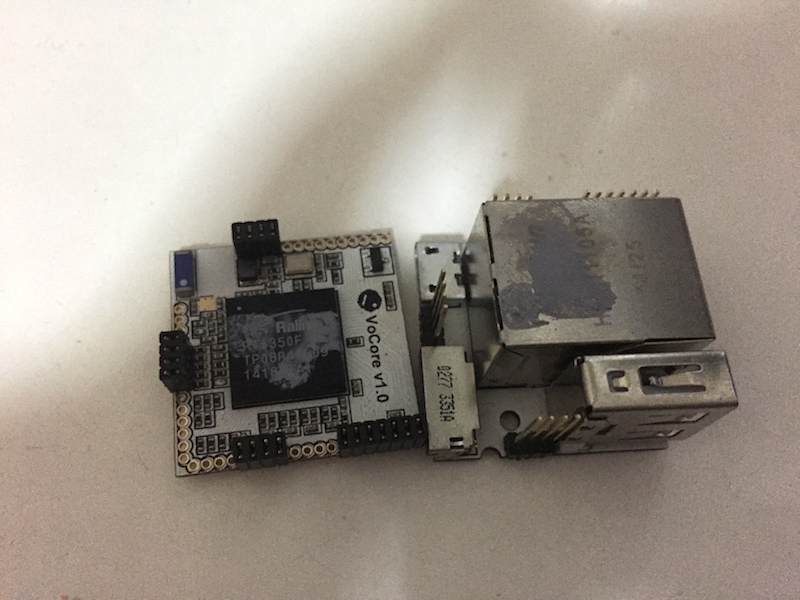
How to detach the VoCore and the Dock?
That is not easy, due to there are almost 20 pins tightly connected together and the pin are long, 14mm, easy to bend.
There is no glue between the VoCore main board and the dock, the white one is just silicone grease make the CPU well touch the ethernet port which is used to be a heat sink.

Detach the VoCore + Dock, two keywords are “vertical” and “slow”, the pin into the female connector about 1.4mm, if you do not do it vertical, the pin might bend.

IMG_0198

VoCore: Starter Tutorial Part2

IMG_0196 (1)

About GPIO, I post a blog when I start VoCore.
Please check this link http://vonger.cn/?p=473.

There is some note about how to finish this:

Connection:

Screen Shot 2014-11-21 at 7.03.13 PM

That 330ohm resistor is necessary, without it, the LED will burn.

Command:
Already in this post http://vonger.cn/?p=473.

Advance:

We can write an API for this LED control, so we can simply control it from browser remotely πŸ™‚ phone, computer, pad, anything have broswer.

Here is the code, based on VoWeb, just add one function:

int voweb_func_gpio0ctrl(socket_data *d, string_reference *pa)
{
    char buf[MESSAGE_SIZE] = "Invalid parameter.";
    FILE *fp;

    fp = fopen("/sys/class/gpio/gpio0/direction", "w");
    if(fp == NULL) {
        sprintf(buf, "update gpio 0 direction failed.");
        return send(d->sock, buf, strlen(buf), 0);
    }
    fwrite("out", 1, 4, fp);
    fclose(fp);

    if(memcmp(pa->ref, "on", 2) == 0) {
        fp = fopen("/sys/class/gpio/gpio0/value", "w");
        if(fp != NULL) {
            fwrite("1", 1, 2, fp);
            fclose(fp);

            sprintf(buf, "update gpio 0 value to 1 success.");
        } else {
            sprintf(buf, "update gpio 0 value to 1 failed.");
        }
    }
    if(memcmp(pa->ref, "off", 3) == 0) {
        fp = fopen("/sys/class/gpio/gpio0/value", "w");
        if(fp != NULL) {
            fwrite("0", 1, 2, fp);
            fclose(fp);

            sprintf(buf, "update gpio 0 value to 0 success.");
        } else {
            sprintf(buf, "update gpio 0 value to 0 failed.");
        }
    }

    return send(d->sock, buf, strlen(buf), 0);
}

And register this function:

string_hash_set(funcs, "gpio0ctrl", (uchar *)voweb_func_gpio0ctrl);

Here is compiled one and necessary html: download

Uncompress vocore.voweb.gpio.test.zip to local folder, such as “~/voweb.gpio”, and scp all of the files to root@192.168.61.1:~/

scp -r ~/voweb.gpio/* root@192.168.61.1:~/

Then run command in vocore.

/root/voweb 8080 /root/html

Just open 192.168.61.1:8080, you will find this page, now, just click on the switch, the LED is under your control.

Here is a simple video:

Any questions, just leave a comment under. πŸ™‚
brandonhead, I like your question πŸ˜€

vonger.cn: Speed Up

There are many people in China report issue to me, my blog is very hard to open, today I find the problem finally…
WordPress load google fonts at head part, but in China the Great Firewall block all google address. So the load process is very very very slow.

Get the bad code in /var/www/html

find . | xargs grep 'fonts.google' 2> /dev/null:

Comment all of them, now the user from China or other country blocked google can view it much much faster πŸ™‚

VoCore: No LuCI 3

From last week, I am thinking of a super light weight web server.
There are many choices:
LuCI + uhttpd, goahead, mini-httpd, etc…

But none of them is perfect for me:

1. cgi part use too much resource.
Fork new child process to deal cgi, and dealing code with Lua. Calling script to create the html page. If I need update frequently, such as video, the board will die for out of memory or cpu 100%.

2. memory control low efficiency.
They call malloc for every memory request. For small memory device, such malloc is pain. It will generate tons of memory fragment, and the core have to arrange them, costs lots of resource.

3. unnecessary optimisation.
We just has one core, so whatever the optimisation you do, remember the most effect way is to make the app run in one thread.
Such on board web server do not have to deal with many people request same time, so use why use pthread? Looks like the reply time is shorter, but underground it costs two times of CPU time, if the load is heavy, it is twice slower.

4. take too much disk(flash) space.
goahead, after I compile it, the size goes to 850KB, and even not contains its dependency library.

So same reason as I make VoCore, I write something looks better to me.

1. advanced memory control.
Only 12KB or even lower memory request. Self maintain memory, do not create memory fragment.

2. optimisation for one core cpu.
The full application only have just one thread, no switch cost.

3. cgi write in pure C code.
This makes it more effective, no middle layer. Pure server, client mode.

4. super fast.
deal 60~80/sec request on VoCore.

5. minimised dependency
Only basic C library is necessary. Do not need pthread, libdl, etc.

6. small executable file size.
After compile, it is 33KB, and do not need addition library. That’s all.

7. source code in one file.
I like sqlite3 style, so I make all files into one file, easy to compile.

This VoWebServer is very “embed”, of course, it is just a new project, many bugs have to be fixed, at least, we have one more choice. πŸ™‚

Here is the source code, once I feel happy about it, will upload to github.
compile it by one line:

cc -g voweb.c -o voweb

Compiled one for VoCore: voweb

run it like this:(put some htmls to /var/www/html, it will get index.html)

voweb 8080 /var/www/html

Then open 192.168.61.1:8080, you will find the page πŸ™‚
Test cgi function: http://192.168.61.1:8080/cgi-bin/love?VoCore
(cgi-bin folder do not exists)

VoCore: Starter Tutorial Part1

In this tutorial, I will show you the full process about setup a develop environment and compile/run a “hello world” on VoCore, step by step.

1. Prepare Linux
a) Download and install VirtualBox. VirtualBox is a famous open source VM software, I like it. If you are using Linux OS already, just ignore this.

https://www.virtualbox.org/wiki/Downloads

Screen Shot 2014-11-20 at 10.45.00 am

Click on the links, you will get the install package, run it to install VirtualBox into your computer. If you have VoCore you can not be a newbie to such thing.

b) Download Ubuntu. Ubuntu is the first UI Linux I used. I like the font πŸ™‚

http://www.ubuntu.com/download/
Screen Shot 2014-11-20 at 10.47.38 am

After download, you will get the ubuntu install iso file.

c) Setup VirtualBox and install ubuntu into it.
Screen Shot 2014-11-20 at 10.51.24 am (2)

Better to have 30GB free disk space(at least 20GB).
Screen Shot 2014-11-20 at 10.51.38 am (2)

Click “Create”, then double click the new item in VBox.
It will popup a window request you to select the iso.
Now select your downloaded ubuntu iso, then click Start.
Screen Shot 2014-11-20 at 10.51.59 am (2)

Rest is the install Ubuntu, I will not post here, please check ubuntu.com for the install instruction.

d) Install VirtualBox driver to ubuntu.
After ubuntu installed and startup successfully, we have to install VirtualBox driver so we can use the network, etc in VM.

Details is here: https://www.virtualbox.org/manual/UserManual.html

Now we have a Linux system in VM.

2. Prepare OpenWrt.(http://vocore.io/wiki/index/id:15)

a) Install necessary tools:
sudo apt-get install zlib1g-dev libncurses5-dev gawk subversion libssl-dev git

b) Download openwrt
git clone git://git.openwrt.org/openwrt.git

c) Make & Compile
goto openwrt folder(git create that), for example: cd ~/openwrt
make menuconfig
Screen Shot 2014-11-20 at 11.07.52 am (2)
make sure the config is like upper picture.

call make to compile openwrt, or make -jX for faster speed.(X is your CPU core number +1, for my macbook pro, it is -j9)

3. Write your first application.
use vi or any text edit, create main.c.

#include <stdio.h>

int main(void)
{
    return printf("hello world\n");
}

Now there are two ways to compile your main.c
One is to write a makefile, put the file to openwrt package folder, I will show this way in later tutorial.

Another way is super simple πŸ™‚ Just make sure main.c is in current folder.

`find . -name mipsel-openwrt-linux-gcc` -g main.c -o hello

Now you have the compiled application, hello.
Note: you might get this warning, just ignore that.

mipsel-openwrt-linux-gcc: warning: environment variable 'STAGING_DIR' not defined

4. Upload to VoCore

a) Connect to your VoCore.

Here is the tutoral

VoCore: Simple Start Tutorial 1

VoCore: Simple Start Tutorial 2

b) scp the file to VoCore, password vocore.

scp ./hello root@192.168.61.1:/tmp/

c) ssh to VoCore.

ssh root@192.168.61.1

d) Try to run your first app.
Works well πŸ™‚
Screen Shot 2014-11-20 at 11.39.21 am (2)

Next tutorial, I will show how to remote control GPIO.

VoCore meet Edison in Beijing Maker Space

Yesterday I have been to Beijing Make(r) Space, find Edison there πŸ™‚

Here is some photo compare VoCore with Edison.
10685604_10204031380318627_2691113683851066857_n

10409143_10204031364398229_4125428993700240538_n

VoCore is much smaller πŸ™‚

1508084_10204031382278676_2530762614300675925_n

This bottom interface is rather not that friendly to hobbyist, if I only have the $50 Edison, I can not use it at all. That slot is hard to buy from everywhere, lol, compare to that, seems VoCore’s 1.27mm connectors are much easy to get. πŸ™‚ That is not the point, at least, I can solder wire to the 1.27mm holes, but I have no idea how to use Edison without its $79(?) breakout board.

Emm, I am a little disappoint. Last year, I was thinking Intel must making some wonderful thing, but the final result is just so so.

VoCore: Check Hardware

Here is some experience, I use them to locate where the VoCore broken, if you have a power supply show VoCore current, this might help.

1. input 5V, current first 0.12A then go 0.15A then 0.25A … your VoCore is normal to boot. When it is in uboot, the current consume is 0.12A~0.14A, and once it into linux, the current is about 0.15A, when wifi prepare to start, the current rise to 0.25A~0.30A(note, the power mush stable or it will reboot at this point), then the current will stable at 0.18A~0.19A if you do not transfer much data through wifi.

2. input 5V, current keep 0.12A~0.14A, can not boot … there is high chance flash is damaged. flash current consume is about 0.03~0.05A average.

3. input 5V, current keep 0.06~0.12A, can not boot … this might be memory problem.

4. input 5V, current is about 0.01A ~ 0.05A, can not boot … this should be RT5350 problem, might be BGA part is not well connect to pad. This always happened if you iron temperature is too high and the weight of the chip will make some BGA balls drop from pads. This should be rare to happen, but from my test, almost every time I use high temperature iron will cause such problem.

5. input 5V, current > 0.5A, I think your power supply is short connected somewhere.

6. input 5V, current = 0A, of course, the power is not connected, or chip is totally destroyed.

VoCore: Solder or NOT?

The package of VoCore contains some female connectors, if solder that on the pin holes, you can plug wire into it, so make the VoCore pin holes life longer.
IMG_0168

But due to most of people do not have such skill to solder that 1.27mm connector: it request a fast/stable hand and a low temperature iron(better <= 200C). Wrong operation might damage the board permanently. VoCore is NOT similar like Arduino, it is much more complex and precise than Arduino, every move must be very careful, even harder than repair a phone. I suggest to boot your VoCore as my two tutorials: http://vonger.cn/?p=1547 http://vonger.cn/?p=1536 I have used that USB DIY wire a long time, it always works well, and will never damage VoCore. The pin hole is Au + Cu, like golden fingers, so it should not that easy be oxidised.

VoCore: No LuCI 2

Looks like goahead is not a good choice to replace LuCI.
It uses too much space(850KB), maybe memory cost is low, but flash cost is not acceptable.
Screen Shot 2014-11-09 at 9.48.35 pm (2)

Also it request librt.so and libpthread.so, that is about 100KB addition flash cost.
Screen Shot 2014-11-09 at 10.01.32 pm

I think maybe write a real light weight one is the only choice. We do not need that complex cgi function, we just need a way to transfer data between browser and the server.
Currently vocore.io/store, the trace page is based on a light weight C language web application(I am not good at php, so have to write one in C), it will not be very hard if we just have a simple cgi and do not use https.

VoCore: About Ship Time

Ship will take about 5~40 days. If it takes very long, I suggest to use DHL/UPS/Fedex.
Alpha, average ship time(about 100 packages):

Position         Average Time    Note
Australia 8 days (min 6, max 12)
Austria 10 days No official data.
Belgium 12 days
Brazil 40 days
Bulgaria 14 days
Canada 14 days
Czech Republic 14 days
Denmark 11 days
Finland 14 days
France 10 days
Germany 15 days
Greece 26 days
Hungary 20 days
Israel 22 days
Italy 20 days
Netherlands 10 days
New Zealand 8 days
Norway 17 days
Poland 14 days
Russian Federation 21 days
Spain 36 days
Sweden 30 days
Switzerland 12 days
Taiwan 14 days
Thailand 9 days
Turkey 16 days
United Kingdom 7 days
United States 7 days (min 4, max 14)
Japan 14 days
India 48 days (min 34, max 70)

To US,UK and Asia the speed is acceptable, 90% packages are delivered in one week; To Europe countries, the speed is fair, about two weeks for most of them, but Spain, Greece, Sweden takes very long time… Even worse, to Brazil, it takes over a month, due to there is no air plane from China.ShenZhen to Brazil. Better to use DHL/UPS/Fedex if you want it get you fast.