VoCore2: OpenWrt 19.07.2

Recently I try latest stable version openwrt, looks like the open source MT76 driver is much stable and fast now.

iperf3 -c 192.168.1.1
Connecting to host 192.168.1.1, port 5201
[  5] local 192.168.1.231 port 60121 connected to 192.168.1.1 port 5201
[ ID] Interval           Transfer     Bitrate
[  5]   0.00-1.00   sec  5.33 MBytes  44.7 Mbits/sec                  
[  5]   1.00-2.00   sec  5.50 MBytes  46.1 Mbits/sec                  
[  5]   2.00-3.00   sec  5.34 MBytes  44.7 Mbits/sec                  
[  5]   3.00-4.00   sec  4.67 MBytes  39.3 Mbits/sec                  
[  5]   4.00-5.00   sec  5.47 MBytes  45.8 Mbits/sec                  
[  5]   5.00-6.00   sec  5.03 MBytes  42.3 Mbits/sec                  
[  5]   6.00-7.00   sec  4.93 MBytes  41.3 Mbits/sec                  
[  5]   7.00-8.00   sec  5.07 MBytes  42.6 Mbits/sec                  
[  5]   8.00-9.00   sec  4.95 MBytes  41.5 Mbits/sec                  
[  5]   9.00-10.00  sec  5.13 MBytes  43.0 Mbits/sec                  
- - - - - - - - - - - - - - - - - - - - - - - - -
[ ID] Interval           Transfer     Bitrate
[  5]   0.00-10.00  sec  51.4 MBytes  43.1 Mbits/sec                  sender
[  5]   0.00-10.09  sec  51.3 MBytes  42.7 Mbits/sec                  receiver

iperf Done.

This is good 🙂 Next firmware will base on this driver and I do not have to patch it anymore.

VoCore2: About Pin Share

Pin share or I call it pinmux, it is a common feature of most MCU chips. Normally a pin we can use it as GPIO or some special functions.

In picture, the orange number is each pins GPIO number. And in the color block, there is its special function.

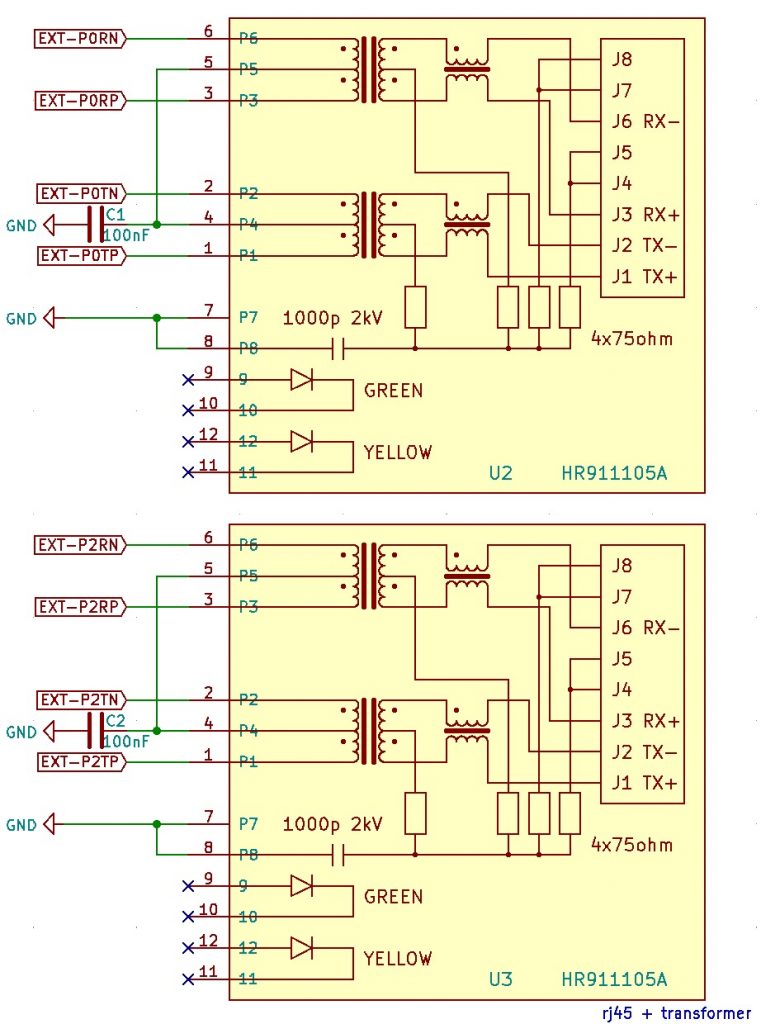
Here is a table from vocore.io/v2.html, for example, the pin 29 on the chip has three functions, one is used as GPIO, one is system reference clock, final one is SDcard CLK.

LeftNameMuxNote
+3.3VO+3.3V outputmax output current 100mA
30TXD0GPIO12, UART0 Lite TXDpull down to GND, Test/Normal mode pin.
31RXD0GPIO13, UART0 Lite RXD3.3V
29REFCLKGPIO11, reference clock, SDXC CLK*
33P0RP10/100 PHY Port #0 RXP
34P0RN10/100 PHY Port #0 RXN
35P0TP10/100 PHY Port #0 TXP
36P0TN10/100 PHY Port #0 TXN
43TXD210/100 PHY Port #1 TXN, GPIO15, PWM Channel, SPI Slave Clock
44RXD210/100 PHY Port #1 TXP, GPIO14, PWM Channel, SPI Slave Chip Select
40PWM010/100 PHY Port #1 RXN, GPIO17, UART2 Lite TXD, SPI Slave MOSI4.7K pull down to GND
42PWM110/100 PHY Port #1 RXP, GPIO16, UART2 Lite RXD, SPI Slave MISO
45P2RP10/100 PHY Port #2 RXP, GPIO18, PWM Channel
46P2RN10/100 PHY Port #2 RXN, GPIO19, PWM Channel
47P2TP10/100 PHY Port #2 TXP, GPIO20, PWM Channel
48P2TN10/100 PHY Port #2 TXN, GPIO21, PWM Channel
49SD WPGPIO22, 10/100 PHY Port #3 TXP, SDXC WP
50SD CDGPIO23, 10/100 PHY Port #3 TXN, SDXC CD
TopNameMuxNote
GNDGroud
28SPI CS0SPI Master Chip Select 04.7K pull up to 3.3V
25SPI CLKSPI Master Clock4.7K pull up to 3.3V
26SPI MISOSPI Master In Slave Out
27SPI MOSISPI Master Out Slave In4.7K pull down to GND
24SPI CS1SPI Master Chip Select 14.7K pull down to GND
21I2C SDGPIO5, I2C Data, SDXC D2*4.7K pull up to 3.3V
20I2C CLKGPIO4, I2C Clock, SDXC D3*4.7K pull up to 3.3V
19I2S CLKGPIO3, I2S Bit Clock, SDXC CMD*
18I2S WSGPIO2, I2S L/R Clock, SDXC D0*
16I2S SDIGPIO0, I2S Data In, SDXC D1*
17I2S SDOGPIO1, I2S Data Out4.7K pull down to GND
RightNameMuxNote
GNDGround
148RXD1GPIO12, UART1 Lite RXD
147TXD1GPIO13, UART1 Lite TXDpull up to 3.3V, GPIO/JTAG mode pin
141GPIO41GPIO41, JTAG TMSJTAG needs 10K pull up, R9 -> R6
140GPIO40GPIO40, JTAG ClockJTAG needs 10K pull up, R9 -> R6
139GPIO39GPIO39, JTAG ResetJTAG needs 10K pull up, R9 -> R6
143GPIO43GPIO43, JTAG TDOJTAG needs 10K pull up, R9 -> R6
142GPIO42GPIO42, JTAG TDIJTAG needs 10K pull up, R9 -> R6
138RSTReset, touch GND to reset
137GPIO38GPIO38
136GPIO37GPIO37
+3.3VO+3.3V outputmax output current 100mA
GNDGround
GNDGround
+1.8VO+1.8V outputmax output current 100mA
BottomNameMuxNote
GNDGround
51SD D1GPIO24, 10/100 PHY Port #3 RXP, SDXC D1
52SD D0GPIO25, 10/100 PHY Port #3 RXN, SDXC D0
54SD CLKGPIO26, 10/100 PHY Port #4 RXP, SDXC CLK
55SD CMDGPIO27, 10/100 PHY Port #4 RXN, SDXC CMD
56SD D3GPIO28, 10/100 PHY Port #4 TXP, SDXC D3
57SD D2GPIO29, 10/100 PHY Port #4 TXN, SDXC D2
+3.3VO+3.3V outputmax output current 100mA
61USB DPUSB2.0 Data+
62USB DMUSB2.0 Data-
+5.0VI+5.0V inputmin input current 500mA
GNDGround
GNDGround
MiddleNameMuxNote
133PCI CKPPCI Express External Reference Clock Output+
132PCI CKNPCI Express External Reference Clock Output-
130PCI RXNPCI Express Differential Receiver RX-
129PCI RXPPCI Express Differential Receiver RX+
GNDGround
127PCI TXPPCI Express Differential Transmit TX+
126PCI TXNPCI Express Differential Transmit TX-
135PCI RSTPCI Express Device Reset

On VoCore2 Ultimate, ES8388 do not need external clock because we can use VoCore2 system reference clock as its source, in most situation, that will save cost of the BOM.

Set the Pin Function

now, question come, how do we setup every pins function? Sometimes you may want use it as GPIO but sometimes we need to use as clock.

Actually it is same as other MCU(like STM32 and ATMEGA–Arduino) , we have register for every function.

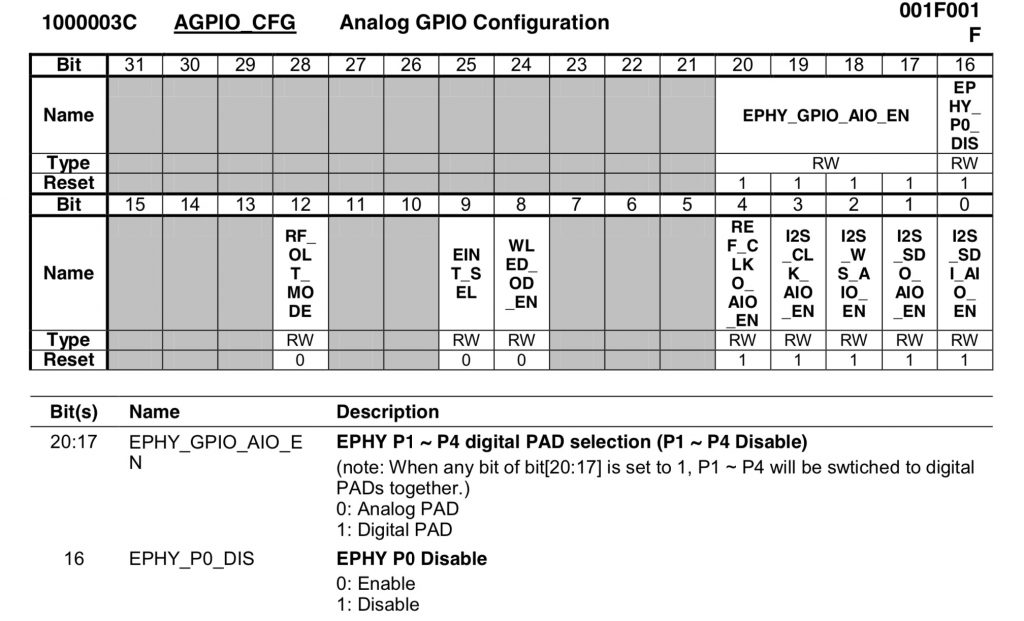
Use this REFCLK pin as example, we can find on MT7628AN datasheet page 117, 2.2 System Control Section, 0x10000060 is that control register.

Its register is 1:0 two bits. (note: on this datasheet, its name is GPIO mode)

We can write 10b to this register, then it will be REFCLK mode.

and after it into REFCLK mode, we can change its frequency, at page 110, 0x1000002c register, bit 11:9 REFCLK0_RATE

And you can use same way to change other pins function 🙂

Also I have a simple tool to do this, please download at vocore.io/v2.html, Directly write to memory/register Section.

VoCore2 + VoCam264: Push Video Stream

mjpeg-streamer is an easy way, but it only able to push mjpeg data, it is a waste because VoCam264 already has h264 stream inside.

So I plan to push h264 data to a RTMP server like nginx-rtmp(-module).

The first way in my mind is to use ffmpeg directly.

Just one command, and it should work: ffmpeg -re -f v4l2 -i /dev/video1 -c:v copy -f flv rtmp://192.168.0.xxx/live

My server is setup at rtmp://192.168.0.xxx/live

Note1: old version ffmpeg do not work well, I am using version 4.2.2. Currently openwrt package has ffmpeg, but it is 3.4.2, we must modify the Makefile and compile again to use latest version. I ave upload Makefile to github.com/vonger/vocore2, in utils folder.

Trying to set codec:h264 pix_fmt:none
parser not found for codec h264, packets or times may be invalid.

Note2: default Makefile will show error about parser, we need to enable h264 parser.

Then ffmpeg is able to push h264 video from camera to server.

Unfortunately, the speed is very slow and video is laggy…Maybe there is something wrong, because it works well on a Linux PC..

I have to find some other way.

My compiled ffmpeg ipk download at here: http://vonger.cn/misc/vocore2/ipk/ffmpeg/

To be continue…

VoCore2 Ultimate: AD/DA usage 2

Forget Keil, I love GCC. Makefile is enough for the ARM based chip GD32F150 🙂

Link to my source code:https://github.com/Vonger/gd32tools

To get AD values from UART2. Here is the Makefile. Source code please use project/adc1.

NAME = $(notdir $(CURDIR))
CMSIS = $(CURDIR)/../../GD32F1x0_Firmware_Library_v3.1.0/Firmware/CMSIS
PERIP = $(CURDIR)/../../GD32F1x0_Firmware_Library_v3.1.0/Firmware/GD32F1x0_standard_peripheral
TOOLCHAIN = $(CURDIR)/../../toolchain/mac/bin/arm-none-eabi

CC = $(TOOLCHAIN)-gcc
CP = $(TOOLCHAIN)-objcopy

DEFINES = -DGD32F130_150 -DUSE_STDPERIPH_DRIVER -DUSE_HSI_8M

INCLUDES = \
	-I$(CURDIR)/../core \
	-I$(CMSIS)/GD/GD32F1x0/Include \
	-I$(PERIP)/Include \
	-I$(CURDIR)

SOURCES = \
	$(CURDIR)/../core/core_cm3.c \
	$(CURDIR)/../core/startup_gd32f1x0.s \
	$(CMSIS)/GD/GD32F1x0/Source/system_gd32f1x0.c \
	$(wildcard $(PERIP)/Source/*.c) \
	$(wildcard $(CURDIR)/*.c)

OBJECTS = $(SOURCES:%.c=%.o)

CFLAGS = \
	-mcpu=cortex-m3 -mthumb -mlittle-endian -mthumb-interwork \
	-ffast-math -fdata-sections -ffunction-sections \
	-Wl,-T,$(CURDIR)/../core/gd32f150g8.ld,-Map,$(NAME).map,--gc-sections \
	-Wall -std=gnu99 -O2 $(DEFINES) $(INCLUDES) 

$(NAME): $(SOURCES)
	@$(CC) $(CFLAGS) $^ -lm -lnosys -o $(CURDIR)/$@
	@$(CP) -O ihex $(CURDIR)/$@ $(CURDIR)/$@.hex

test:
	@echo $(OBJECTS)

clean:
	@rm -f $(CURDIR)/$(NAME)
	@rm -f $(CURDIR)/$(NAME).map

GD32F1x0_Firmware_Library_v3.1.0 this library is from GigaDevice. Download here: http://vonger.cn/misc/vocore2/GD32F1x0_Firmware_Library_v3.1.0.rar; For toolchain, please check http://vonger.cn/?p=14891, I have a link there.

The library is for Keil originally. I make some patches, all changes are in project/core folder.

  • startup_gd32f1x0.s this mainly change the interrupt vector, we need the interrupt callback function name same.
  • gd32f150g8.ld this is used to create bin or hex file which is used to load into flash.

For VoCore2 Ultimate, we use internal 8M clock, so comment the line 46 #define __SYSTEM_CLOCK_72M_PLL_HXTAL and uncomment line 47 #define __SYSTEM_CLOCK_72M_PLL_IRC8M_DIV2 in GD32F1x0_Firmware_Library_v3.1.0/Firmware/CMSIS/GD/GD32F1x0/Source/system_gd32f1x0.c

Now we are ready to make. in adc1 folder, call make, it will create adc1.hex.

Connect BOOT pin on the dock to 3.3V pin on VoCore2, then power on them from microUSB.

Once VoCore2 ready, run gd32up to load adc1.hex. After upload done, power off it and disconnect BOOT from 3.3V (We do not export its RST pin, so have to power off to reset).

After you connect it back to power, the GD32F150 will in ADC mode, UART2 on VoCore2 is not for USB2TTL anymore, it will output ADC value to VoCore’s UART2. We can use minicom to view it at VoCore2 console, 115200, 8n1.

VoCore2: run GCC in it

This is a tutorial for using C/C++ compile application in VoCore2.

1. Prepare a USB disk or SD card, at least 256MB, because GCC takes around 110MB. USB disk or SD card must be EXT4 format.

For macOS or Linux, call mkfs.ext4 /dev/disk2 to do this. /dev/disk2 is the USB disk name on my computer, please change to the name on your computer. Or another way, directly format it in VoCore2, need to install e2fsprogs.

opkg update
opkg install e2fsprogs
mkfs.ext4 /dev/sda

NOTE: opkg updaterequires internet, check vocore.io/v2.html, AP+Client mode for wireless connection. Or modify network switch settings, set ethernet port0 to VLAN 2(wan).

This is an example, directly patch /etc/config/network. Another way, you can change virtual network switch in LuCI, Network->Switch.

 config switch_vlan     
         option device 'switch0'
-        option vlan '1'  
+        option vlan '2'    
         option ports '0 6t'

2. Mount SD/USB storage to /overlay

Patch /etc/config/fstab, add target /overlay to make sure once storage is detected, system will auto mount it to /overlay.

config 'global'
        option  anon_swap       '0'
        option  anon_mount      '0'
        option  auto_swap       '1'
        option  auto_mount      '1'
        option  delay_root      '5'
        option  check_fs        '0'

config 'mount'
        option  device  '/dev/sda'
        option  target  '/overlay'
        option  enabled '1'

config 'mount'
        option  device  '/dev/mmcblk0'
        option  target  '/overlay'
        option  enabled '1'

/dev/sda is for USB disk, /dev/mmcblk0 is for SD card.

3. Reboot

Make sure /overlay is valid. You can check by command df.

root@OpenWrt:~# df
Filesystem           1K-blocks      Used Available Use% Mounted on
/dev/root                12800     12800         0 100% /rom
tmpfs                    62492       660     61832   1% /tmp
/dev/mmcblk0          30363504    148636  28649428   1% /overlay
overlayfs:/overlay    30363504    148636  28649428   1% /
tmpfs                      512         0       512   0% /dev

Or another way, directly manually mount /dev/sda or /dev/mmcblk0 to /overlay folder by command mount /dev/sda /overlay.

4. Now we can install GCC

This part is easy, just call

opkg update
opkg install gcc

It will install gcc, ar, binutils,libbfd, objdump, libopcodes packages from openwrt server.

Then we can compile C source code, try gcc yourcode.c -o out. Speed is not very fast, but works.

NOTE: compile better in /tmp folder(it is memory virtual disk) or in /overlay(it is the SD card we inserted). Rest path will store in NOR flash who has very limited write times and very little free space.

VoCore2: touch screen for HMI ready

Finally I make this:

VoCore2+Qt+Touch

It works very smooth, just like smart phone. And color is very well too. 🙂 I really like this small device, I guess it should be the lowest cost WVGA(800×480) UI solution or HMI solution. 1K units should be less than 10USD, so with VoCore2, the full solution cost can be less than 20USD.

Now I am busy on doing the final debug and fix. Hopefully in next month, I can get first batch of the production and put on vocore.io.

Because currently I am updating the fully screen every frame, so its FPS is pretty low, only 30fps, but I find a way to update the screen partially, so once I finish the next patch, the screen will reach 60fps, can be run on VoCore, Android smart phone and Windows computer as an extend screen.

Qt recently public MCU1.0, running on a very expansive platform over 30USD with low speed CPU and only 1MB~4MB memory. I guess it will be perfect with VoCore and this screen. I will be the first guy port it. :p

VoCore2: Temperature and Humidity Sensor(I2C)

i2c-tools is not that easy to use in some situation. Recently I need to make sure my room is wet enough to kill virus, so I develop a simple tool based on SHT20 — a temperature and humidity sensor, but I find I can not use i2c-tools to test SHT20 I2C bus, it missed some key features.

I have to spend couple of hours write another one.

usage: i2ctest [dev path] [address] [r/w] [length/data]


example:

show device on i2c-0:
	i2ctest /dev/i2c-0

read 3 byte from i2c-0, address 0x40:
	i2ctest /dev/i2c-0 0x40 r 3

write 2 byte(0xe2 0x88) to i2c-0, address 0x21:
	i2ctest /dev/i2c-0 0x21 w '0xe2 0x88'

For my usage, query i2c devices:

root@OpenWrt:/tmp# i2ctest /dev/i2c-0 
0x10: BUSY
0x40: READY

0x10 is BUSY because the ES8388 driver already taken the address.

0x40 is the SHT20 address. From SHT20 datasheet, write 0xF3 first then read 3 bytes from it, we will get temperature.

root@OpenWrt:/tmp# i2ctest /dev/i2c-0 0x40 w 0xf3
write: 1 byte(s)
root@OpenWrt:/tmp# i2ctest /dev/i2c-0 0x40 r 3
00000000: 64 98 56                                            d.V

Calculate from the data: T = 0x6498 * 175.72 / 65536 – 46.85 = 22.198C

Here is the source code for i2ctest.c

#include <stdio.h>
#include <string.h>
#include <fcntl.h>
#include <unistd.h>
#include <errno.h>
#include <sys/ioctl.h>

#include <linux/i2c.h>
#include <linux/i2c-dev.h>


#define min(a, b)	((a) < (b) ? (a) : (b))

void hex_print(const unsigned char* s, int size, FILE *fp)
{
	int i = 0, n = 0, c = 0, p = 0;

	// default print to stdout.
	if (fp == NULL)
		fp = stdout;

	while(1) {
		n = size > 0x10 ? 0x10 : size;
		size -= n;

		p += fprintf(fp, "%08X: ", c);
		for(i = 0; i < n; i++) {
			if(i == 8) {
				p += fprintf(fp, " ");
			}
			p += fprintf(fp, "%02X ", *(s + c + i));
		}
		for(i = n; i < 0x10; i++) {
			if(i == 8) {
				p += fprintf(fp, " ");
			}
			p += fprintf(fp, "   ");
		}
		p += fprintf(fp, "   ");
		for(i = 0; i < n; i++) {
			if(*(s + c + i) >= 0x20 && *(s + c + i) <= 0x7E) {
				p += fprintf(fp, "%c", *(s + c + i));
			} else {
				p += fprintf(fp, ".");
			}
		}
		p += fprintf(fp, "\n");
		if(size <= 0) {
			break;
		}
		c += n;
	}
}

// convert string to unsigned int.
// hex: 0x, oct: 0, bin: ...b, dec: normal.
unsigned int atox(char* s)
{
	char *p = s, *e = s;
	unsigned int r = 0;

	while(*e != '\0')
		e++;

	if(*p == '0' && (*(p + 1) == 'x' || *(p + 1) == 'X')) {
		// hex: skip first 0x or 0X header.
		p += 2;

		while(p != e) {
			r <<= 4;
			r += ((*p >= '0' && *p <= '9') ? (*p - '0') : ((*p >= 'A' && *p <= 'F') ?
			    *p - 'A' + 0xA : ((*p >= 'a' && *p <= 'f') ? *p - 'a' + 0xA : 0)));
			p++;
		}
	} else if((e - p) >= 2 && *(e - 1) == 'b') {
		// bin: ignore last b.
		e--;

		while(p != e) {
			r <<= 1;
			r += (*p == '0' ? 0 : 1);
			p++;
		}
	} else if(*p == '0') {
		// oct: skip first 0 header.
		p += 1;

		while(p != e) {
			r <<= 3;
			r += ((*p >= '0' && *p <= '7') ? (*p - '0') : 0);
			p++;
		}
	} else {
		// dec: we do not need to deal the number.
		while(p != e) {
			r *= 10;
			r += ((*p >= '0' && *p <= '9') ? (*p - '0') : 0);
			p++;
		}
	}

	return r;
}

int decode_data(unsigned char *out, int max, const char *in)
{
	int used = 0;
	const char *p = in;
	char num[5] = {0};

	while (*p) {
		if (*p == ' ') {
			p++;
			continue;
		}

		if (*p != '0')
			return 0;

		if (used >= max)
			return used;

		memcpy(num, p, 4);
		out[used++] = atox(num);

		p += 4;
	}

	return used;
}

int main(int argc, char *argv[])
{
	unsigned char buf[0x100] = {0};
	int i2c, code, size;

	if (argc != 2 && argc != 5) {
		printf("usage: i2ctest [dev path] [address] [r/w] [length/data]\n");
		printf("\n\nexample:\n");
		printf("\nshow device on i2c-0:\n"
		       "\ti2ctest /dev/i2c-0\n");
		printf("\nread 3 byte from i2c-0, address 0x40:\n"
		       "\ti2ctest /dev/i2c-0 0x40 r 3\n");
		printf("\nwrite 2 byte(0xe2 0x88) to i2c-0, address 0x21:\n"
		       "\ti2ctest /dev/i2c-0 0x21 w '0xe2 0x88'\n\n");
		return 0;
	}

	i2c = open(argv[1], O_RDWR);
	if (i2c < 0) {
		printf("error: can not open device %s\n", argv[1]);
		return -1;
	}

	if (argc == 2) {
		for (code = 0; code < 0x7f; code++) {
			ioctl(i2c, I2C_SLAVE, (unsigned char)code);
			if (errno == EBUSY)
				printf("0x%02x: BUSY\n", code);
			size = write(i2c, buf + code, 1);
			if (size > 0)
				printf("0x%02x: READY\n", code);
		}
		return 0;
	}

	code = ioctl(i2c, I2C_SLAVE, (unsigned char)atox(argv[2]));
	if (code < 0) {
		printf("error: can not set address to %s\n", argv[2]);
		return -1;
	}

	switch (argv[3][0]) {
	case 'r': {
		size = min(sizeof(buf), atox(argv[4]));
		size = read(i2c, buf, size);
		hex_print(buf, size, stdout);
		break; }

	case 'w': {
		size = decode_data(buf, sizeof(buf), argv[4]);
		size = write(i2c, buf, size);
		printf("write: %d byte(s)\n", size);
		break; }

	default: {
		printf("error: unsupport mode %c.\n", argv[3][0]);
		return -1; }
	}

	close(i2c);
	return 0;
}

compile it: mipsel-openwrt-linux-gcc i2ctest.c -o i2ctest

Notify: Shipping Delayed until Feb.10

Recently The well known Corona Virus from Wuhan is spreading very fast…Our China government extended Chinese New Year holiday to Feb.9 in order to slow down the virus spreading. From Jan.20 to Feb.10, we can not ship out any package.

Sorry about the delay, hope the disaster will pass soon…

VoCore2: develop SPI driver 6

Recently Wuhan Virus is pretty bad in China, hopefully everything back well soon.

Now I have success use GPIO as CS pins, it is not hard but have to cost a lot of time understanding how the SPI driver works 🙂

Here is the patch for spi-mt7621.c, also upload to github.com/vonger/vocore2, 811-spi-gpio-chip-select.patch

 --- a/drivers/spi/spi-mt7621.c
+++ b/drivers/spi/spi-mt7621.c
@@ -107,9 +107,15 @@
  u32 polar = 0;
 
     mt7621_spi_reset(rs, cs);
+
+ if (cs >= 2) { /* gpio chip select mode */
+ enable = (spi->mode & SPI_CS_HIGH) ? enable : !enable;
+ gpio_set_value_cansleep(spi->cs_gpio, enable);
+ } else {
  if (enable)
  polar = BIT(cs);
  mt7621_spi_write(rs, MT7621_SPI_POLAR, polar);
+ }
 }
 
 static int mt7621_spi_prepare(struct spi_device *spi, unsigned int speed)
@@ -383,9 +389,17 @@
  return -EINVAL;
  }
 
+ if (spi->chip_select >= 2 && gpio_is_valid(spi->cs_gpio))
+ gpio_request_one(spi->cs_gpio, GPIOF_OUT_INIT_HIGH, dev_name(&spi->dev));
+
  return 0;
 }
 
+static void mt7621_spi_cleanup(struct spi_device *spi)
+{
+ gpio_free(spi->cs_gpio);
+}
+
 static const struct of_device_id mt7621_spi_match[] = {
  { .compatible = "ralink,mt7621-spi" },
  {},
@@ -438,10 +452,11 @@
  master->mode_bits = RT2880_SPI_MODE_BITS;
 
  master->setup = mt7621_spi_setup;
+ master->cleanup = mt7621_spi_cleanup;
  master->transfer_one_message = mt7621_spi_transfer_one_message;
  master->bits_per_word_mask = SPI_BPW_MASK(8);
  master->dev.of_node = pdev->dev.of_node;
- master->num_chipselect = 2;
+ master->num_chipselect = of_gpio_named_count(pdev->dev.of_node, "cs-gpios");
  master->max_transfer_size = mt7621_max_transfer_size;
 
  dev_set_drvdata(&pdev->dev, master);

Here is the patch explain:

  1. For chip select number is 0,1, we use old driver way, SPI hardware register will control the CS0 and CS1
  2. For the chip select we added, CS2, CS3, etc, we use GPIO way, so we call gpio_set_value_cansleep, use GPIO way to control them.
  3. In order to use those GPIO, we need to call gpio_request to alloc GPIO from the kernel, once it is done, we use gpio_free to release resource.
  4. SPI master max SPI device now is not 2, it is the GPIO CS pins we defined in DTS(device tree file)

After this patch, we have the SPI new driver ready, but still need to setup DTS to tell the driver which GPIO we want to use as CS pins.


&spi0 {
status = "okay";

cs-gpios = <&gpio0 6 GPIO_ACTIVE_HIGH>,
  <&gpio0 10 GPIO_ACTIVE_HIGH>,
  <&gpio1 5 GPIO_ACTIVE_HIGH>,
  <&gpio1 6 GPIO_ACTIVE_HIGH>;


m25p80@0 {
...
};

spidev1@1 {
#address-cells = <1>;
#size-cells = <1>;
compatible = "rohm,dh2228fv";
reg = <1>;
spi-max-frequency = <100000000>;
};

spidev2@2 {
#address-cells = <1>;
        #size-cells = <1>;
        compatible = "rohm,dh2228fv";
        reg = <2>;
        spi-max-frequency = <100000000>;
};

spidev3@3 {
        #address-cells = <1>;
        #size-cells = <1>;
        compatible = "rohm,dh2228fv";
        reg = <3>;
        spi-max-frequency = <100000000>;
    };
};


<GPIO0 5> <GPIO0 10> is not really used as GPIO, just a place holder for CS0, CS1. <GPIO1 5> is CS2, it is GPIO37(32+5), <GPIO1 6> is CS3, it is GPIO38(32+6). Once we have this, we can connect SPI device CS pins to it, I use spidev_test check if it is working.

Note: spi-mt7621 max allowed data length is 16byte, so do not send data exceeds this number, or it will oops. Use ‘-p’ parameter to avoid spidev_test default send 38 bytes.

My test result:

root@OpenWrt:/# spidev_test -D /dev/spidev0.3 -p '\x020'
spi mode: 0x0
bits per word: 8
max speed: 500000 Hz (500 KHz)
RX | 00 1A __ __ __ __ __ __ __ __ __ __ __ __ __ __ __ __ __ __ __ __ __ __ __ __ __ __ __ __ __ __  | ..

I connected one LoRA device SX1278, and using spidev0.3, in DTS it is spidev3@3, I can successfully read its 0x02 register and get its data is 0x1A.

Here is the same data I read from logic analyzer.

VoCore2: Use VoCore2 & OpenOCD to debug VoCore2 by JTAG

This blog will include two parts, first, make one VoCore2(name it host) into a JTAG compatible device, like JLINK; second, enable another one VoCore2(name it client) JTAG port, so we can use host JTAG connect to it and debug.

my simple crappy JTAG device :’) middle one is the host with a breakout board, right small one is the client device, left one is some 10kR resistors pull up every JTAG pins to 3.3V

OK, let’s start how to make it.

JTAG Host Device

  1. OpenOCD only requires some GPIOs to make the JTAG work in TAP mode, so let’s define some GPIOs as JTAG pins.
TMS = GPIO41, TCLK = GPIO40, JRST = GPIO39, TDO = GPIO43, TDI = GPIO42, SRST = GPIO38

JTAG has five pins, TMS, TCLK, JRST, TDO, TDI. SRST is for system reset, openOCD will use this pin to reset client VoCore.

2. Add pull up resistor to all of the JTAG pins.

3. Now install openocd to VoCore2. I have uploaded openocd package Makefile to github.com/vonger/vocore2, in utils/openocd folder, or you can directly use the openocd Makefile in openwrt official feeds named “package”.

It will require some depends: hidapi_0.8.0-rc1-2_mipsel_24kc.ipk, libftdi1_1.4-6_mipsel_24kc.ipk, libusb-1.0_1.0.22-1_mipsel_24kc.ipk, libusb-compat_0.1.5-1_mipsel_24kc.ipk

Note: actually we do not need hidapi, libusb, but install it is the most easy way, so we do not have to modify its Makefile.

4. Download openOCD configure file for VoCore2. I am using configure from https://github.com/Neutree/MT7688-OpenOCD, jlink-gpio.cfg. Because my GPIO setting is different, so need to modify its pin define.

# tck tms tdi tdo
sysfsgpio_jtag_nums 40 41 42 43
sysfsgpio_srst_num 39
sysfsgpio_trst_num 38

bindto 0.0.0.0

Note: For OpenWrt 21.02, gpio start from 416, not 0. It is weird but true, we need to use gpio 456(416+40) to export gpio 40. It should be sysfsgpio_jtag_nums 456 457 458 459.

Now, this host JTAG VoCore2 prepare is done. Actually it is ready to debug any JTAG compatible device, just need different cfg files.

If you want to access it from remote, must add bindto command, or openocd will bind to localhost only, can not access from outside. Sad, I spend two hours to solve this problem, I thought it was firewall issue. 🙁

JTAG Client Device

  1. We need to change default bootstrap from GPIO to JTAG. One way is directly modify register 0x10000010 SYSCFG0, but it will back to GPIO mode once you reboot. Another way is to modify bootstrap resistor, we have to use this way.
change default R9 resistor to R6 position, that will enable JTAG mode on client device

2. connect host JTAG cables to it. All of the six cables are necessary.

client connection, do not forget connect host/client GND together

3. connect client VoCore2 and host VoCore2 GND together, to avoid data transfer issue.

Ready to RUN!

Now we have prepared the JTAG host device and a test client device. We can power them on with 5V.

In host VoCore2, run command: openocd -f jlink-gpio.cfg &, it will create a server process, in jlink-gpio.cfg, we define telnet port is 4444 and gdb port is 3333, then we can use telnet connect to VoCore2 4444 port(remember to open the port at firewall).

Here is my log:


root@OpenWrt:~# openocd -f jlink_gpio.cfg
Open On-Chip Debugger 0.10.0
Licensed under GNU GPL v2
For bug reports, read
http://openocd.org/doc/doxygen/bugs.html
SysfsGPIO nums: tck = 40, tms = 41, tdi = 42, tdo = 43
SysfsGPIO num: srst = 39
SysfsGPIO num: trst = 38
adapter_nsrst_delay: 100
Info : auto-selecting first available session transport "jtag". To override use 'transport select <transport>'.
jtag_ntrst_delay: 100
trst_and_srst separate srst_gates_jtag trst_push_pull srst_open_drain connect_deassert_srst
0
Info : SysfsGPIO JTAG/SWD bitbang driver
Info : JTAG only mode enabled (specify swclk and swdio gpio to add SWD mode)
Info : This adapter doesn't support configurable speed
Info : JTAG tap: mt7688.cpu tap/device found: 0x1762824f (mfg: 0x127 (MIPS Technologies), part: 0x7628, ver: 0x1)

And telnet side (I am new to openOCD, I guess this log means it already works somehow)

 
Vongers-MacBook-Pro-2:~ vonger$ nc 192.168.61.1 4444
Info : accepting 'telnet' connection on tcp/4444
Open On-Chip Debugger
> ddrinit
ddrinit
Warn : target not halted
target not halted
Error: mem2array: Read @ 0xb0000028, w=4, cnt=1, failed
mem2array: Read @ 0xb0000028, w=4, cnt=1, failed
jlink_gpio.cfg:50: Error: 
in procedure 'ddrinit' 
at file "jlink_gpio.cfg", line 50
jlink_gpio.cfg:50: Error: 
in procedure 'ddrinit' 
at file "jlink_gpio.cfg", line 50
> halt
halt
target halted in MIPS32 mode due to debug-request, pc: 0x8000b1a8
> reg
===== mips32 registers
(0) r0 (/32): 0x00000000
(1) r1 (/32): 0x00000001
(2) r2 (/32): 0x81000040
(3) r3 (/32): 0x804E5220
(4) r4 (/32): 0x810BC180
(5) r5 (/32): 0x00000000
(6) r6 (/32): 0x00100000
(7) r7 (/32): 0x00000001
(8) r8 (/32): 0x10000000
(9) r9 (/32): 0x10000000
(10) r10 (/32): 0x00000000
(11) r11 (/32): 0x706C6174
(12) r12 (/32): 0x08000000
(13) r13 (/32): 0x00000003
(14) r14 (/32): 0x00000000
(15) r15 (/32): 0xFF200000
(16) r16 (/32): 0x804A9A90
(17) r17 (/32): 0x00008000
(18) r18 (/32): 0x00000001
(19) r19 (/32): 0x00100000
(20) r20 (/32): 0x81000040
(21) r21 (/32): 0xFFFFFFFF
(22) r22 (/32): 0x00001001
(23) r23 (/32): 0x00000000
(24) r24 (/32): 0x00000003
(25) r25 (/32): 0x00000002
(26) r26 (/32): 0x87FF0000
(27) r27 (/32): 0x00000000
(28) r28 (/32): 0x80458000
(29) r29 (/32): 0x80459CD0
(30) r30 (/32): 0x0000001F
(31) r31 (/32): 0x80491CE4
(32) status (/32): 0x10000000
(33) lo (/32): 0x00000088
(34) hi (/32): 0x00000000
(35) badvaddr (/32): 0x77E8BA18
(36) cause (/32): 0x40008008
(37) pc (/32): 0xFF200208
(38) f0 (/32): 0x00000000
(39) f1 (/32): 0x00000000
(40) f2 (/32): 0x00000000
(41) f3 (/32): 0x00000000
(42) f4 (/32): 0x00000000
(43) f5 (/32): 0x00000000
(44) f6 (/32): 0x00000000
(45) f7 (/32): 0x00000000
(46) f8 (/32): 0x00000000
(47) f9 (/32): 0x00000000
(48) f10 (/32): 0x00000000
(49) f11 (/32): 0x00000000
(50) f12 (/32): 0x00000000
(51) f13 (/32): 0x00000000
(52) f14 (/32): 0x00000000
(53) f15 (/32): 0x00000000
(54) f16 (/32): 0x00000000
(55) f17 (/32): 0x00000000
(56) f18 (/32): 0x00000000
(57) f19 (/32): 0x00000000
(58) f20 (/32): 0x00000000
(59) f21 (/32): 0x00000000
(60) f22 (/32): 0x00000000
(61) f23 (/32): 0x00000000
(62) f24 (/32): 0x00000000
(63) f25 (/32): 0x00000000
(64) f26 (/32): 0x00000000
(65) f27 (/32): 0x00000000
(66) f28 (/32): 0x00000000
(67) f29 (/32): 0x00000000
(68) f30 (/32): 0x00000000
(69) f31 (/32): 0x00000000
(70) fcsr (/32): 0x00000000
(71) fir (/32): 0x00000000