Continue…
Why we can not use official version:
1. its wifi is default disabled.
2. it do not have default password.
3. its wifi driver is not works well.
And point 1,2,3, openwrt do not allow me submit patch, because it will broken other device. Point 3 is pretty important, use official mt76 driver, wireless speed only 5~10Mbps, and frequently disconnect…
So as openwrt community suggested, I have to use external patch. Some patch like SD card fix etc that they allow to submit, already in the openwrt source code.
=================================================================
Now, we need to port mt7628 driver to replace official mt76 driver for better speed and experience.
PS: use non-official driver also brings new problem, because it do not support standard linux wireless interface, have to patch LuCI and iwinfo to make it work…that is a lot of work and bring in bugs. So best way is to fix that mt76 driver. I am trying, but it is very long code hard to read…
I have tutorial about how to imply mt7628 driver, it is at https://github.com/vonger/vocore2, just copy it here
How to use it
1. add this feeds to your openwrt source.
cd ~/openwrt
cp feeds.conf.default feeds.conf
echo src-git vocore2 https://github.com/vonger/vocore2.git >> feeds.conf
./scripts/feeds update vocore2
cp -r ./feeds/vocore2/mt7628 ./package/kernel
2. patch your openwrt with necessary patches to use this driver.
cd ~/openwrt
patch -p1 < ./package/kernel/mt7628/openwrt/000-*.patch

mkdir ./package/network/utils/iwinfo/patches
cp ./package/kernel/mt7628/openwrt/080-*.patch ./package/network/utils/iwinfo/patches
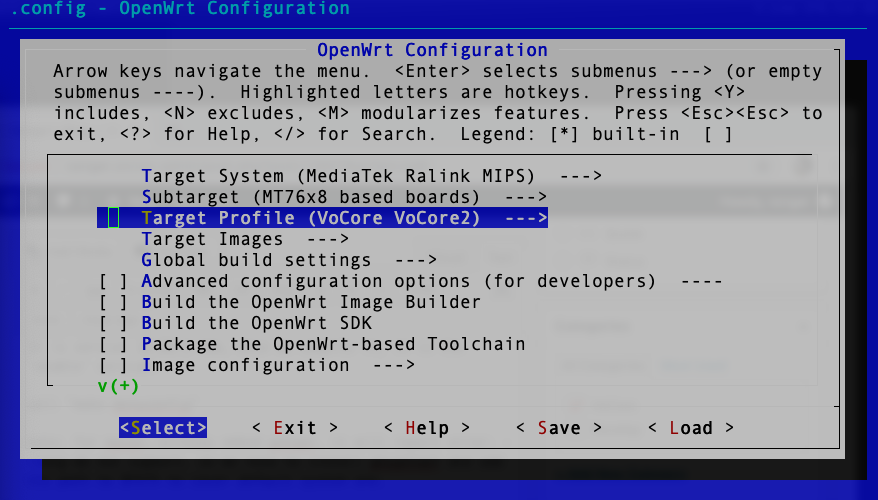
3. config mt7628 in make menuconfig Kernel modules -> Wireless Drivers -> kmod-mt7628
Target System: MediaTek Ralink MIPS
Subtarget: MT76x8 based boards
Kernel modules -> Wireless Drivers -> unselect kmod-mt76 / select kmod-mt7628 -> select WiFi Operation Mode -> enable AP-Client support for AP+STA mode; enable SNIFFER for monitor mode.
Base System -> select wireless-tools (need its iwpriv)
Network(option): unselect wapd-mini/hostapd-common (mt7628.ko already have WPA support)
Global build settings(option): Kernel build options -> /dev/mem virtual device support(enable /dev/mem for easy debug)
Global build settings(option): unselect Cryptographically signed package lists (this will block compile)
When apply the patch, there is an small warning: openwrt/target/linux/ramips/base-files/etc/board.d/01_leds
PS: It is because my patch is for latest trunk, so it not patch well.
just delete openwrt/target/linux/ramips/base-files/etc/board.d/01_leds.orig, and modify openwrt/target/linux/ramips/base-files/etc/board.d/01_leds
1. remove this if there is any:
vocore2)
set_wifi_led "$boardname:fuchsia:status"
;;
vocore2lite)
set_wifi_led "$boardname:green:status"
;;
2. keep this lines:
vocore2)
set_wifi_led "$boardname:fuchsia:status" "ra0"
;;
vocore2lite)
set_wifi_led "$boardname:green:status" "ra0"
;;
If you can not do this, please read some tutorials about “How to use patch”
Or lazy way, just remove 01_led patch from the pacth file in openwrt/package/kernel/mt7628/openwrt/000-vocore2-compatible.patch it will cause VoCore2 LED do not flash after wifi connected.
Finally, we can make, after that, we can get a firmware with mt7628 driver support.
PS: make will take hours, so be patient…