Monthly Archives: June 2019

VoCam264: Get H264 Data

Because of Linux kernel updated pretty fast, the demo in VoCam264 SDK is already out of date…

We will need some changes to make TestAP able to compile:

  1. change include file from <linux/videodev.h> to <linux/videodev2.h>
  2. add header include to <string.h> and <stdio.h> to sonix_xu_ctrls.c, so compiler will stop complain the missing headers.

Now we can use mipsel-openwrt-linux-gcc to compile the TestAP.

mipsel-openwrt-linux-gcc *.c -o TestAP

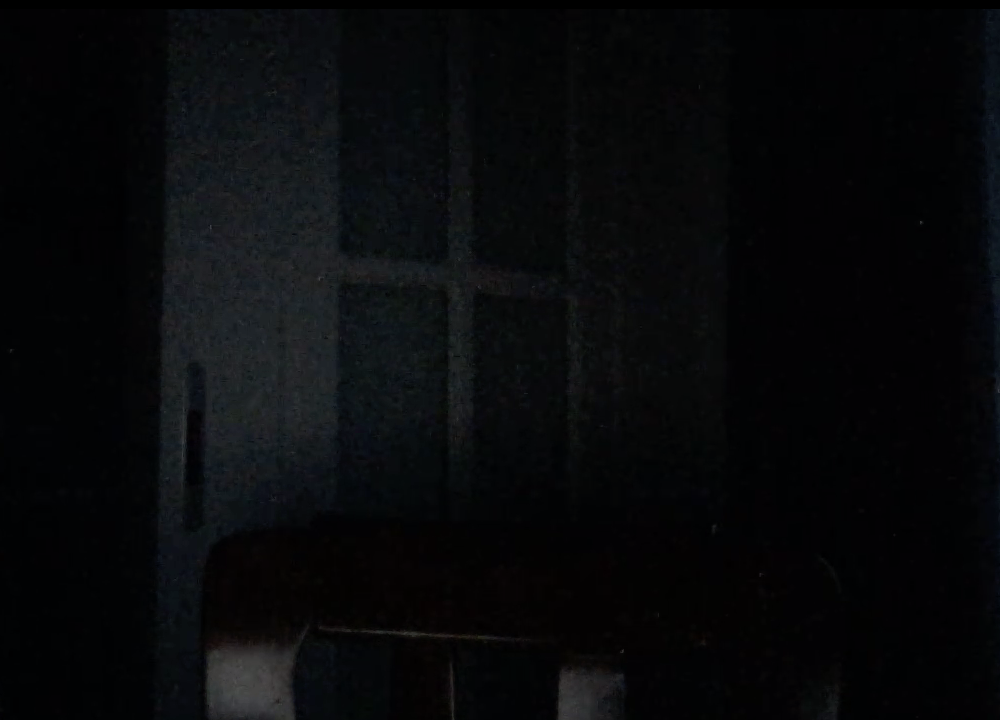
To record h264 data, first go to /tmp folder or /mnt/mmcblk0p1 or /mnt/sda1(make sure the device has enough space for data) then use SONiX_UVC_TestAP -c -f H264 -r /dev/video1 -s 1920×1080 record it to that folder.

It will generate a file named RecordH264.h264, you can use ffplay to watch it.

The test application will record video with bitrate around 10Mb/s, so one second it will take around 1.3MB disk space, very big 🙂 we need to find a way to reduce the bitrate. I guess that will have to use its XU interface, but because Linux UVC interface changed, we do not have UVCIOC_CTRL_ADD, UVCIOC_CTRL_SET and UVCIOC_CTRL_GET anymore, the demo code is totally broken now, have to upgrade and patch it..

Now new interface is UVCIOC_CTRL_MAP which used to replace UVCIOC_CTRL_ADD and UVCIOC_CTRL_QUERY, which used to replace UVCIOC_CTRL_SET/GET.

Such as OSD function and motion detection function are both depends on those XU functions.

To be continue…❤️

VoCore2: Interesting issue of UART

I find a weird issue, if I use one VoCore2 UART0 to read another VoCore2 UART2(debug output), I will get some random chars at uboot output stage, then once Linux load UART driver, the output become normal.

Finally I find out the problem, this is because uboot serial port baudrate is not correct…

From MT7628 datasheet, if we want set serial port to 115200Hz, we should set register to 2500000 / 115200Hz = 21.7, but the register only accept integer…in uboot code, it sets register to 21, but in Linux driver code, set it to 22, you see that is a very big difference. In uboot, the real frequency is 2500000 / 21 = 119007Hz, but in Linux, it is 2500000 / 22 = 113636Hz. This difference make the UART can not decode the wave correctly then cause it display the random chars.

Interesting thing is, CP2102 and GD32F150 both do not have such issue. They must using some other way to decode the UART wave, so it can ignore the big gap 🙂

I have updated uboot code(set register to 22, same as Linux UART driver) and uploaded to vocore.io/v2.html download zone, please update and have a try 🙂

To upgrade uboot, in uboot menu, choose ‘7’, then use kermit protocol upload the uboot, rest uboot will do it automatically.

VoCore2: PWM control motor

VoCore2 has four PWM port, so with GPIOs, we can drive up to four motors or two stepper motors.

The picture shows the four ports.

To use PWM2, PWM3, we need switch this pin group from “uart2” to “pwm”, I have added this to github vocore2 patch.

PS: I use uart2 as console port, but not this group, so no conflict. This group named “uart2” but my real UART2 is using group “spis”, this is defined in Linux kernel source in arch folder, search mt7620.c

And we also need necessary driver for pwm port, openwrt already have it. We just need to select it from openwrt menuconfig => Kernel modules => Other modules => kmod-pwm-mediatek-ramips.

Now everything require for firmware is ready. Latest firmware (>20190624) already have pwm support.

Now we can try PWM, for example, I use PWM3 as output.

echo 3 > /sys/devices/platform/10000000.palmbus/10005000.pwm/pwm/pwmchip0/export

now in

/sys/devices/platform/10000000.palmbus/10005000.pwm/pwm/pwmchip0/, you will find a new folder named “pwm3”, in it, there are some files.

root@OpenWrt:/sys/devices/platform/10000000.palmbus/10005000.pwm/pwm/pwmchip0/pwm3# ls
capture     duty_cycle  enable      period      polarity    uevent

‘duty_cycle’ is how much high in one period, and ‘period’ is the time of one period, from my test, period unit is 1ns. and its value range is 10000~100000(10K~100KHz), ‘enable’ is use to enable PWM output, these three interface are enough to control simple PWM wave.

Let’s try:

echo 10000 > period
echo 5600 > duty_cycle
echo 1 > enable

From my logic analyzer, it has pretty good result:

PS: its output is exactly 5.6us, just this analyzer do not good enough to show that. 🙂


To be continue…

VoCam264: Upgrade

VoCam264 now has a new upgrade.

  1. removed the power noise on CMOS.
  2. reduce the hot noise on CMOS.
  3. reduce around 100mW power usage.
  4. new design make it easy to adjust lens.
  5. better thermal design, no heatsink.
  6. in 40C environment, still have good quality video.
  7. small size, compare to old version, 3mm more in width.

From my test, at 29.5C environment, power consume is around 800mW, camera temperature is around 49C at 1080p 25fps.

I am pretty happy to this result. 🙂

Compare to Macbook Pro Facetime camera in dark environment.

The upper one is captured by facetime camera…

This one is captured by VoCam264.

I know both of them are very dark(maybe need an eagle eye :), we can clearly find out, VoCam264 is much lower noise and more details in a dark area.

PS: now 800w camera is already come, but from my test, its power consume is very high, also need more power to transfer the data…my production target is small, low power consume and most important, price should keep low. 1080p is already good enough for most usage, so I will keep current solution for one or two more years.

VoCore2: DIY sound record device

It is pretty simple to do this, you only need a VoCore2 Ultimate and a compatible microphone(VoCore2 Ultimate headphone interface is HP_L, HP_R, GND, MIC)

1. Download latest firmware from vocore.io/v2.html, currently I am using 20190604.bin
2. Upgrade your vocore2, if you do not know how to upgrade, read vocore.io/v2.html first.
3. in VoCore2, run the following commands:

echo '#!/bin/sh' > /usr/bin/record
echo '/usr/bin/arecord -f dat' >> /usr/bin/record
chmod +x /usr/bin/record
echo 'nc -ll -p 9090 -e /usr/bin/record &' > /etc/rc.local 

Now VoCore2 is ready, reboot, it will automatically run.

Note: if you do not want it boot at startup, remove the final command and call nc -ll -p 9090 -e /usr/bin/record

We can use any device able to connect to VoCore2 to read the sound data now 🙂
For example, on my macbook, I connect to VoCore2 AP first, then call nc 192.168.61.1 9090 > test.wav
Ctrl+C to end, then I can play test.wav to get the audio I recorded.

Maybe there is some way you can make the audio live online, do your homework.

PS: I make this only for fun. 🙂 Please do not use it for evil.

VoCore2: Weird Issue of Audio 2

When develop embed device, the hardest part is debug weird issue. It is because the bug is very hard to locate, it might be hardware, kernel, or application. Currently the record audio bug is absolutely a weird bug.

But I finally get it!

Bug and me are good friends, we like to play “hide and seek”, if it wins, it is free to drink my blood; if I win, I kill it!

It is because ES8388 ADC require DAC to work, what the design…It is absolutely a chip bug.

Now it works perfectly, recorded sound is very clear. 🙂
And alsamixer is working fine too.

VoCore2: tinc setting up

Prepare a LINUX computer who has public IP, use it as SERVER, named s0
VoCore2 setting up Station mode or AP+Station mode, make it connect to internet, named s1

My VPN network ip address alloc to 192.168.88.xxx, and my VPN network named vonet.

Server part setting up

1. install tinc: for example, apt-get install tinc
2. prepare folders.

mkdir /etc/tinc
mkdir /etc/tinc/vonet
mkdir /etc/tinc/vonet/hosts
echo vonet >> /etc/tinc/nets.boot

3. prepare scripts.

touch /etc/tinc/vonet/tinc-down

#!/bin/sh
ifconfig $INTERFACE down

touch /etc/tinc/vonet/tinc-up

#!/bin/sh
ifconfig $INTERFACE 192.168.88.1 netmask 255.255.255.0

touch /etc/tinc/vonet/tinc.conf

Name=s0
Interface=tun0
Device=/dev/net/tun
Mode=switch

touch /etc/tinc/vonet/hosts/s0

Address=[your server public ip address]
Subnet=192.168.88.1/32

4. chmod +x /etc/tinc/vonet/tinc-*
5. create keys. tincd -n vonet -K

note: [your server public ip address] replace to your server public ip, format like 11.22.33.44.

Client part, on VoCore2

1. Install tinc:

opkg update
opkg install tinc

2. make folders

mkdir /etc/tinc
mkdir /etc/tinc/vonet
mkdir /etc/tinc/vonet/hosts
echo vonet >> /etc/tinc/nets.boot

3. scripts:

touch /etc/tinc/vonet/tinc-down

#!/bin/sh
ifconfig $INTERFACE down

touch /etc/tinc/vonet/tinc-up

#!/bin/sh
ifconfig $INTERFACE 192.168.88.12 netmask 255.255.255.0

touch /etc/tinc/vonet/tinc.conf

Name=s1
ConnectTo=s0
Interface = tun0
Device = /dev/net/tun
Mode=switch

touch /etc/tinc/vonet/hosts/s1

Subnet=192.168.88.1/32
Address=[your client ip]

4. chmod +x /etc/tinc/vonet/tinc-*
5. make keys: tincd -n vonet -K
note: just press enter, it will create a private rsa-key for your current device and a public rsa-key directly attach to /etc/tinc/vonet/host/s1(which is for current device)

6. setting up firewall:

uci set firewall.@zone[1].device="tun0"
uci commit firewall

note: [your client ip] is your vocore station ip address alloced from your router.

After this, copy s0 from server to client /etc/tinc/vonet/hosts
and same time, copy s1 from client to server /etc/tinc/vonet/hosts

call “tinc -n vonet”, start VPN on both server and client.

vonet is my network name, you can change it to yours.