About GPIO, I post a blog when I start VoCore.
Please check this link http://vonger.cn/?p=473.
There is some note about how to finish this:
Connection:
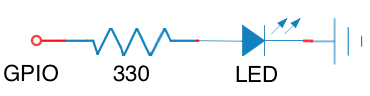
That 330ohm resistor is necessary, without it, the LED will burn.
Command:
Already in this post http://vonger.cn/?p=473.
Advance:
We can write an API for this LED control, so we can simply control it from browser remotely 🙂 phone, computer, pad, anything have broswer.
Here is the code, based on VoWeb, just add one function:
int voweb_func_gpio0ctrl(socket_data *d, string_reference *pa)
{
    char buf[MESSAGE_SIZE] = "Invalid parameter.";
    FILE *fp;

    fp = fopen("/sys/class/gpio/gpio0/direction", "w");
    if(fp == NULL) {
        sprintf(buf, "update gpio 0 direction failed.");
        return send(d->sock, buf, strlen(buf), 0);
    }
    fwrite("out", 1, 4, fp);
    fclose(fp);

    if(memcmp(pa->ref, "on", 2) == 0) {
        fp = fopen("/sys/class/gpio/gpio0/value", "w");
        if(fp != NULL) {
            fwrite("1", 1, 2, fp);
            fclose(fp);

            sprintf(buf, "update gpio 0 value to 1 success.");
        } else {
            sprintf(buf, "update gpio 0 value to 1 failed.");
        }
    }
    if(memcmp(pa->ref, "off", 3) == 0) {
        fp = fopen("/sys/class/gpio/gpio0/value", "w");
        if(fp != NULL) {
            fwrite("0", 1, 2, fp);
            fclose(fp);

            sprintf(buf, "update gpio 0 value to 0 success.");
        } else {
            sprintf(buf, "update gpio 0 value to 0 failed.");
        }
    }

    return send(d->sock, buf, strlen(buf), 0);
}
And register this function:
string_hash_set(funcs, "gpio0ctrl", (uchar *)voweb_func_gpio0ctrl);
Here is compiled one and necessary html: download
Uncompress vocore.voweb.gpio.test.zip to local folder, such as “~/voweb.gpio”, and scp all of the files to root@192.168.61.1:~/
scp -r ~/voweb.gpio/* root@192.168.61.1:~/
Then run command in vocore.
/root/voweb 8080 /root/html
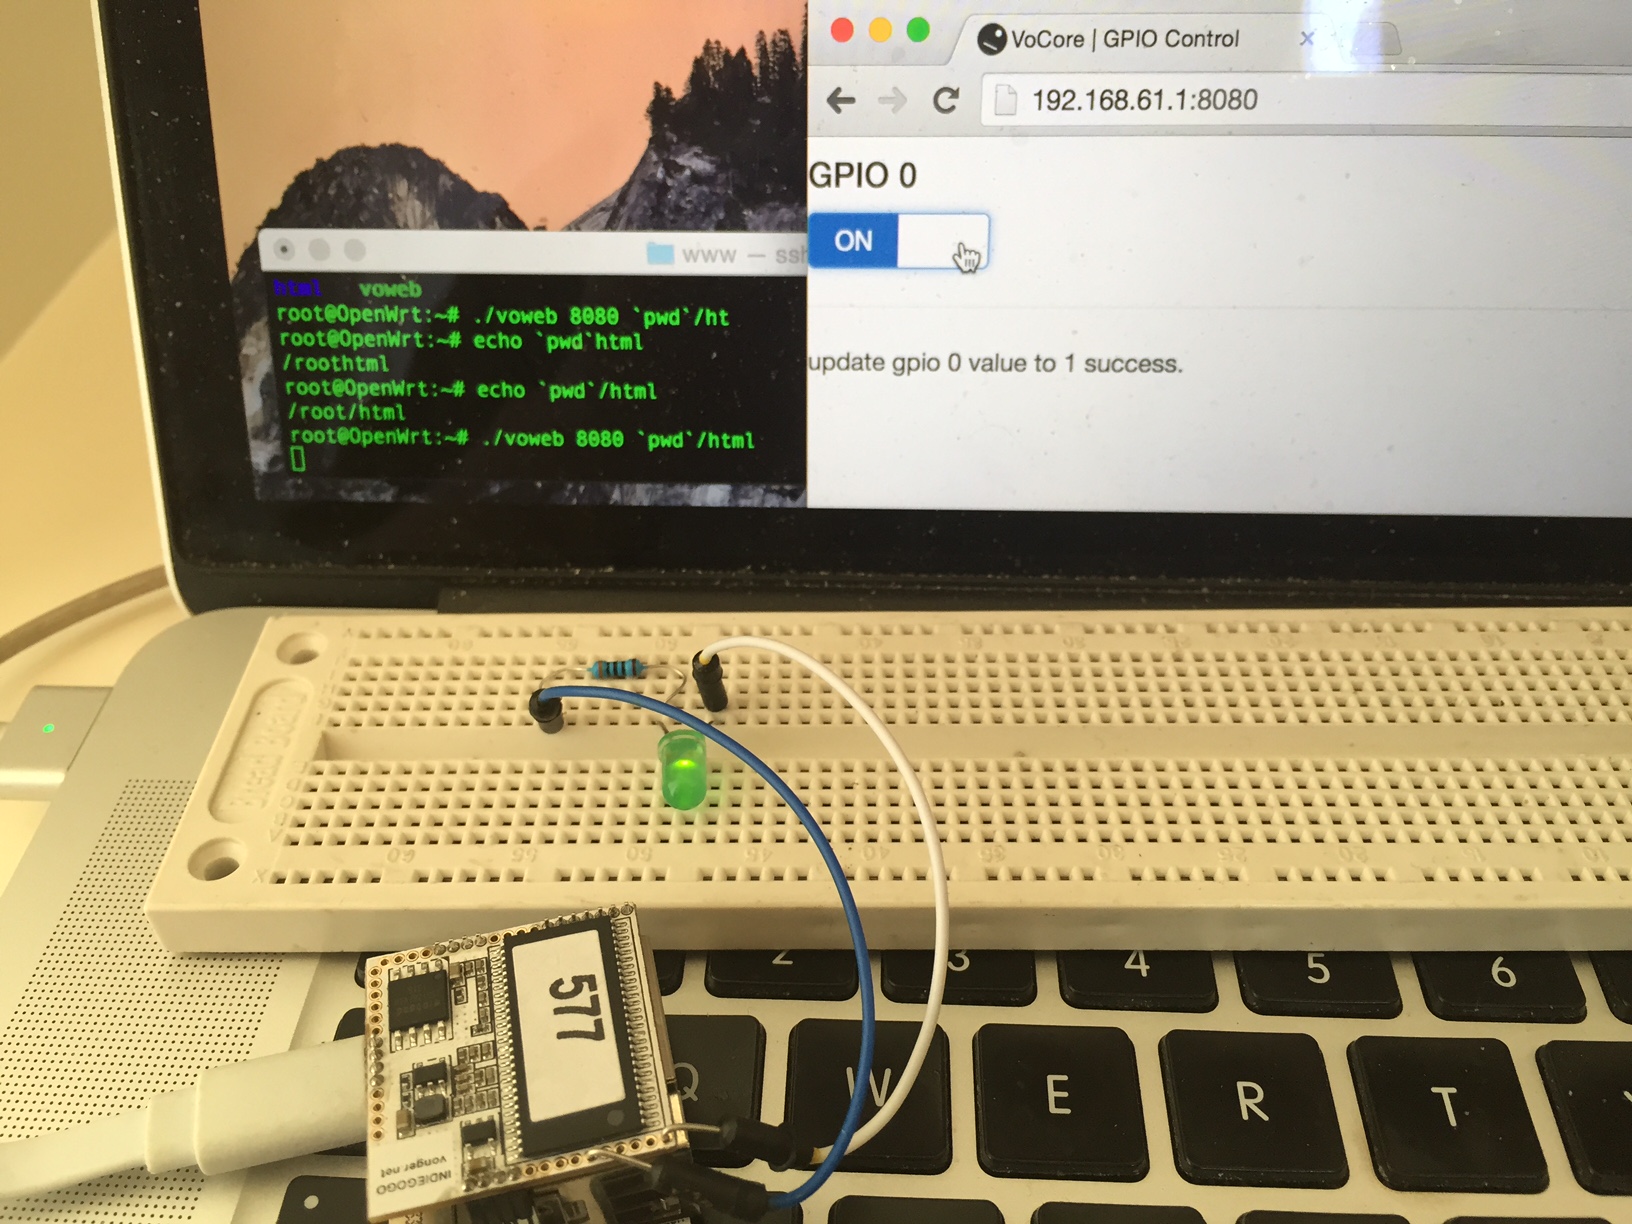
Just open 192.168.61.1:8080, you will find this page, now, just click on the switch, the LED is under your control.
Here is a simple video:
Any questions, just leave a comment under. 🙂
brandonhead, I like your question 😀
Any chance of making a step by step VIDEO for the API for us beginners?? 🙂
OK nevermind the video, I figured it out.
But now, if I want to change GPIO0 to GPIO18, do I just change GPIO0 to GPIO18 in vowed.c file or other files as well?
How do I add more GPIO switches?
copy the function code, change GPIO0 to GPIO1, GPIO2…etc
It would really be useful to learn from you how to connect an LCD to the VoCore. I see that this has been done, but in the interest of creating a standalone device that does not require another device to operate, we need a few things:
– Keyboard/Mouse combo (via the USB dock or via a Bluetooth transceiver)
– Display
I see that an LCD from sparkfun.com has been used by someone. Which one and how was it connected?
Perhaps a tutorial or a brief schematic on how to hook an LCD onto the GPIO pins would be welcome. I know the ones for the Rasberry Pi (3.2″) work well with the Pi, but if the same work with the VoCore, or any other, it would help to know and see how to hook it up.
Thank you for your suggestion 🙂
That RT3050 chip is same as RT5350. So that blog should work on VoCore too.
I have no such tutorial yet, so I courage you try to find a way yourself and share it. Good luck.