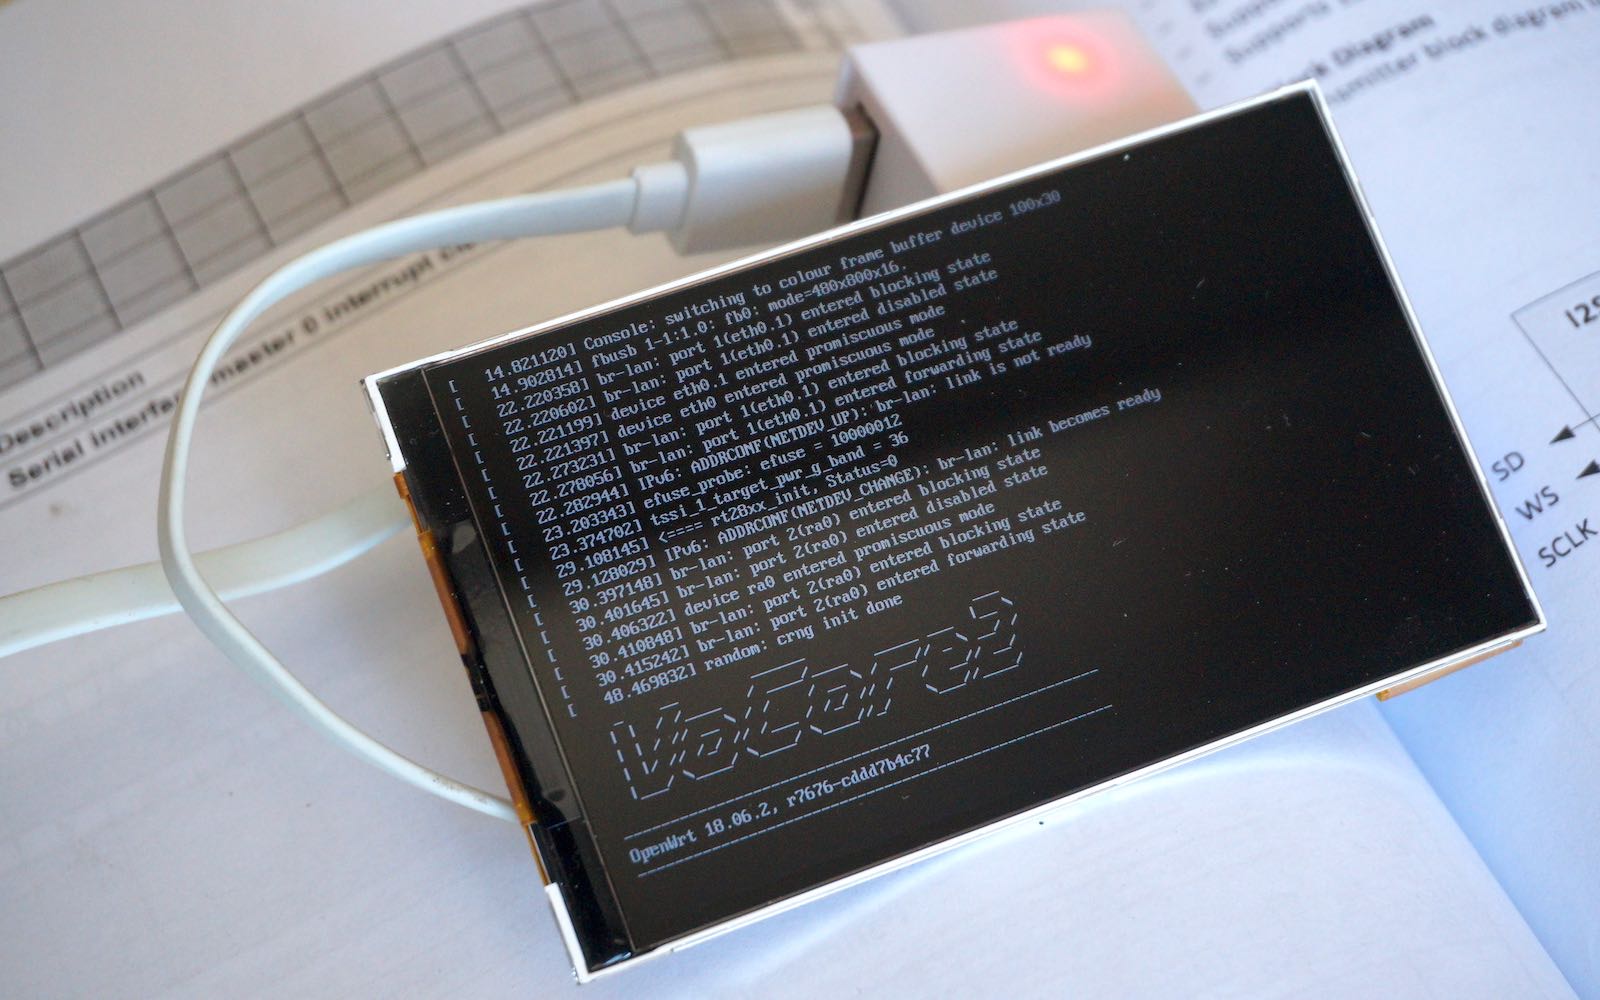
VoCore2 Ultimate and its USB screen.
My USB screen is a standard framebuffer device, and VoCore2 is a standard linux device, so showing something from console to the screen is simple.
Prepare Firmware
Compile your own firmware or download my compiled firmware at vonger.cn/misc/screen/20190828.bin. The driver name is fbusb, I have submitted its source code to github.com/vonger, feel free to submit patch.
PS: The driver supports different driver chip(must be 8080 interface), currently we support ili9806g for the screen back marked ‘vocore2’, another one is based on nt35510, back mark is ‘djn1522’. Their driver board is same but pin order is different, and for later screen we will only use the version based on nt35510.
PSS: Both of the screens support 24bit color in Windows Bitmap format, unfortunately, Linux driver do not support that yet, it only support 8/16/32 bit color and 24bit color is not taken 3 bytes, it takes 4bytes…because of this small issue, we have to modify linux framebuffer code to support 24bit color, but that is pretty complex, I did not done yet(use libusb send the 24bit data is a better way).
OK, now let’s back to topic. To enable the driver, just download fbusb to openwrt packages folder and in “make menuconfig” select VoCore2 -> (M)fbusb.
After compile, you will have fbusb.ko.
We also need to modify VOCORE2.dtsi in openwrt source code at target/linux/ramips/dts/, set bootargs to bootargs = “console=ttyS2,115200 console=tty0 fbcon=rotate:3”; , this means show console both on ttyS2 which is our debug serial port and tty0 which is the screen framebuffer console. rotate:3 is used to rotate the screen position, default it is vertical.
Upgrade VoCore2
Copy the firmware to VoCore2 and use sysupgrade flash it or just use LuCI interface system upgrade…This tutorial also at vocore.io/v2u.html
Connect screen to it and reboot. Then around 10 seconds, you will find the console as the title picture. If you want some input, connect one USB hub and one USB keyboard. 🙂